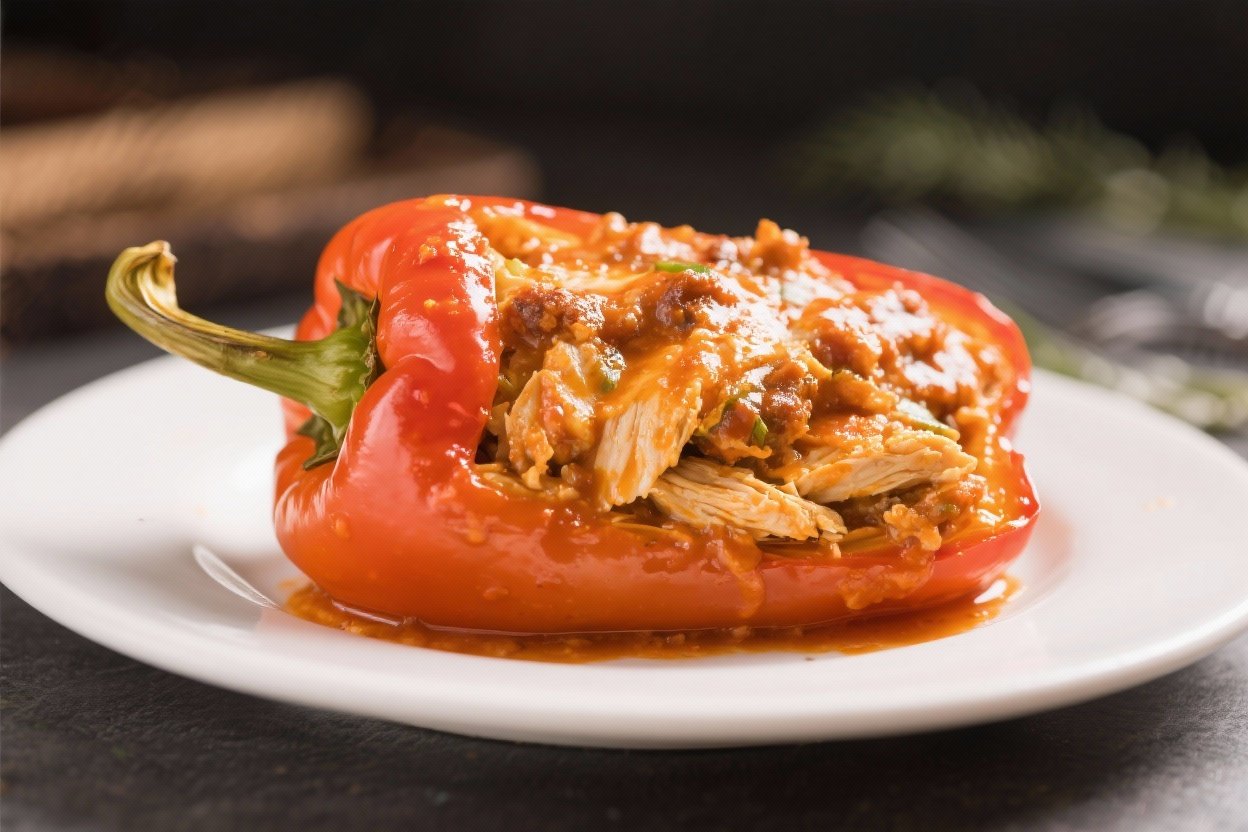
Buffalo Chicken Stuffed Peppers – Spicy, Creamy, and Satisfying
If you love the bold flavor of Buffalo wings but want something a little lighter and more balanced, these Buffalo Chicken Stuffed Peppers hit the sweet spot. They’ve got tender bell peppers, creamy and spicy chicken filling, and a bubbly, cheesy finish that feels like comfort food without the heavy guilt. This recipe is perfect for weeknights, meal prep, or game day when you want something hearty but still fresh.
Never wonder what's for dinner again.
Get 7 healthy, family-friendly dinners complete with recipes, grocery lists, and simple meal plans delivered straight to your inbox.
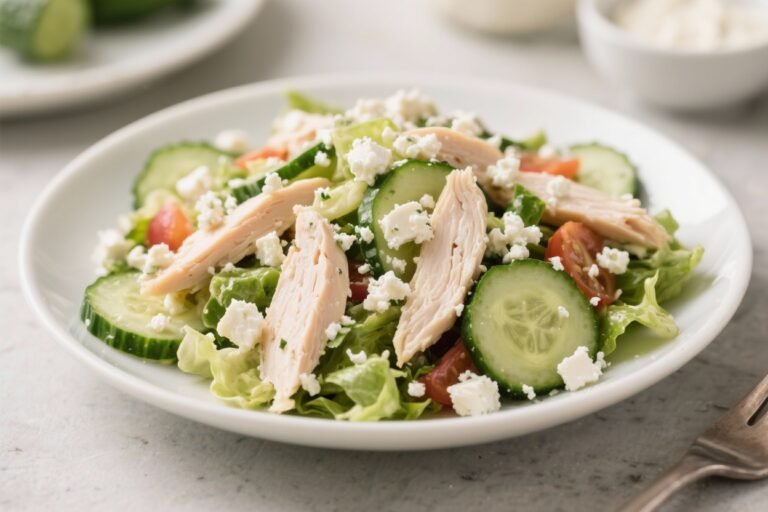
The steps are straightforward, the ingredients are simple, and the result is a crowd-pleaser. Serve them on their own or with a crisp side salad, and you’re set.

Buffalo Chicken Stuffed Peppers - Spicy, Creamy, and Satisfying
Ingredients
- Bell peppers: 4 large peppers, any color, halved and seeded
- Cooked chicken: 3 cups shredded or chopped (rotisserie works great)
- Buffalo sauce: 1/2 to 3/4 cup, depending on heat preference
- Greek yogurt or softened cream cheese: 1/2 cup (Greek yogurt keeps it lighter)
- Shredded mozzarella or Monterey Jack: 1 to 1 1/2 cups
- Crumbled blue cheese (optional): 1/4 cup
- Green onions: 2–3, thinly sliced
- Garlic: 2 cloves, minced
- Onion powder: 1/2 teaspoon
- Salt and black pepper: to taste
- Olive oil: 1 tablespoon
- Ranch or blue cheese dressing: for drizzling (optional)
- Fresh parsley or cilantro: for garnish (optional)
Instructions
- Prep the peppers: Preheat your oven to 400°F (200°C). Slice the peppers in half from top to bottom and remove seeds and membranes. Rub the cut sides with olive oil and a pinch of salt.
- Pre-bake the shells: Place pepper halves cut side up on a baking sheet or in a casserole dish. Bake for 10–12 minutes to soften slightly. This helps them cook through without getting soggy later.
- Mix the filling: In a large bowl, combine shredded chicken, Buffalo sauce, Greek yogurt or cream cheese, garlic, onion powder, half of the shredded cheese, and most of the green onions. Season with salt and pepper. Taste and adjust the Buffalo sauce to your heat preference.
- Stuff the peppers: Spoon the filling into each pepper half, packing it in gently. Top with the remaining shredded cheese and a sprinkle of blue cheese if using.
- Bake until bubbly: Return to the oven and bake for 15–18 minutes, until the peppers are tender and the cheese is melted and browned in spots.
- Finish and serve: Let the peppers rest for 5 minutes. Drizzle with ranch or blue cheese dressing if you like. Garnish with the remaining green onions and chopped parsley or cilantro. Serve hot.
Why This Recipe Works

Buffalo chicken and bell peppers are a natural match: the peppers add sweetness and structure that balance the heat and tang of the sauce. The filling stays creamy and satisfying thanks to a mix of Greek yogurt or cream cheese, which also helps the flavors hold together.
Baking the peppers softens them just enough while keeping a little bite for texture. A touch of blue cheese or ranch brings that classic Buffalo finish without overpowering the dish. Everything comes together in under an hour with minimal prep.
What You’ll Need
- Bell peppers: 4 large peppers, any color, halved and seeded
- Cooked chicken: 3 cups shredded or chopped (rotisserie works great)
- Buffalo sauce: 1/2 to 3/4 cup, depending on heat preference
- Greek yogurt or softened cream cheese: 1/2 cup (Greek yogurt keeps it lighter)
- Shredded mozzarella or Monterey Jack: 1 to 1 1/2 cups
- Crumbled blue cheese (optional): 1/4 cup
- Green onions: 2–3, thinly sliced
- Garlic: 2 cloves, minced
- Onion powder: 1/2 teaspoon
- Salt and black pepper: to taste
- Olive oil: 1 tablespoon
- Ranch or blue cheese dressing: for drizzling (optional)
- Fresh parsley or cilantro: for garnish (optional)
How to Make It

- Prep the peppers: Preheat your oven to 400°F (200°C).
Slice the peppers in half from top to bottom and remove seeds and membranes. Rub the cut sides with olive oil and a pinch of salt.
- Pre-bake the shells: Place pepper halves cut side up on a baking sheet or in a casserole dish. Bake for 10–12 minutes to soften slightly.
This helps them cook through without getting soggy later.
- Mix the filling: In a large bowl, combine shredded chicken, Buffalo sauce, Greek yogurt or cream cheese, garlic, onion powder, half of the shredded cheese, and most of the green onions. Season with salt and pepper. Taste and adjust the Buffalo sauce to your heat preference.
- Stuff the peppers: Spoon the filling into each pepper half, packing it in gently.
Top with the remaining shredded cheese and a sprinkle of blue cheese if using.
- Bake until bubbly: Return to the oven and bake for 15–18 minutes, until the peppers are tender and the cheese is melted and browned in spots.
- Finish and serve: Let the peppers rest for 5 minutes. Drizzle with ranch or blue cheese dressing if you like. Garnish with the remaining green onions and chopped parsley or cilantro.
Serve hot.
Storage Instructions
Store leftovers in an airtight container in the refrigerator for up to 4 days. Reheat in a 350°F (175°C) oven for 10–12 minutes or microwave in 30-second bursts until warmed through. For freezing, cool completely, wrap each pepper tightly, and freeze for up to 2 months.
Thaw overnight in the fridge, then reheat in the oven so the peppers keep their texture. Add a fresh drizzle of sauce or dressing after reheating to brighten the flavors.
Health Benefits
- Balanced macros: Lean chicken provides protein, while yogurt or cream cheese adds a little fat for satisfaction. You get fiber and vitamins from the peppers.
- Veggie-forward: Using bell peppers as the base reduces refined carbs and boosts vitamin C and antioxidants.
- Customizable heat: You control the Buffalo sauce, making the dish as gentle or spicy as you like.
- Lighter swaps: Greek yogurt cuts calories and adds probiotics compared to heavier cream-based options.
Common Mistakes to Avoid
- Skipping the pre-bake: Raw peppers take longer to soften and can leave you with undercooked shells and overcooked filling.
Pre-baking keeps things even.
- Overfilling with sauce: Too much Buffalo sauce can make the filling runny. Start with 1/2 cup and add a little more if the mixture still holds together.
- Using watery chicken: If your chicken is very moist, pat it dry before mixing. Excess moisture can pool in the bottom of the peppers.
- Blasting the heat: Don’t crank the oven too high.
A steady 400°F gives you tender peppers and melted cheese without scorching.
Variations You Can Try
- Low-carb and extra protein: Stir in riced cauliflower or chopped steamed broccoli for more volume without extra carbs.
- Cheese swap: Use pepper jack for extra spice or sharp cheddar for a richer flavor. Skip blue cheese if you prefer a milder finish.
- Ranch lovers: Mix 1–2 tablespoons of ranch seasoning into the filling for a tangy twist.
- Grain boost: Add 1 cup cooked quinoa or brown rice to the filling to stretch the recipe and add hearty texture.
- Make it dairy-free: Use a dairy-free cream cheese or plain coconut yogurt and a vegan shredded cheese. Check that your Buffalo sauce is dairy-free.
- Ground chicken version: Sauté 1 1/2 pounds ground chicken with garlic and a pinch of salt, then mix with Buffalo sauce and the rest of the ingredients.
- Air fryer method: Pre-bake pepper halves at 375°F for 5–6 minutes, stuff, then air fry for 7–10 minutes until the cheese is browned.
FAQ
Need More Easy Dinner Ideas?
Get my FREE 7-Day Easy Dinner Reset and enjoy a full week of healthy dinners without the meal-planning stress.
Can I use canned chicken?
Yes, but drain it well and break it up with a fork before mixing.
Rotisserie or leftover roasted chicken usually gives better texture and flavor, but canned works in a pinch.
What Buffalo sauce should I use?
Use your favorite brand. Classic sauces made with cayenne pepper and butter flavor taste best here. If you like it milder, choose a medium sauce and add a little extra yogurt to tame the heat.
Do I need to peel the peppers?
No.
The skins soften as they bake and help the peppers hold their shape. Peeling is unnecessary and makes them too delicate.
How can I make this spicier?
Add a pinch of cayenne or diced pickled jalapeños to the filling. You can also finish with a few extra dashes of Buffalo sauce before serving.
What should I serve with these?
A simple side salad with ranch, roasted potato wedges, or celery and carrot sticks keeps the Buffalo theme going.
Garlic bread is great if you want something more filling.
Can I prep this ahead?
Yes. Assemble the stuffed peppers up to a day in advance, cover, and refrigerate. Add 3–5 extra minutes to the bake time to heat through fully.
How do I keep the filling from being too dry?
Use enough sauce and a creamy binder like Greek yogurt or cream cheese.
Don’t overbake; pull them when the cheese is melted and the peppers are just tender.
Is there a way to make it lighter?
Use Greek yogurt, part-skim cheese, and extra veggies in the filling. Skip the dressing drizzle and finish with fresh herbs and a squeeze of lemon for brightness.
Wrapping Up
Buffalo Chicken Stuffed Peppers deliver everything you love about game-day flavors in a simple, weeknight-friendly package. They’re easy to customize, great for meal prep, and satisfying without being heavy.
Once you try this version, you’ll find plenty of ways to make it your own—spicier, cheesier, or veggie-packed. Keep a few peppers and some cooked chicken on hand, and dinner practically makes itself.
Printable Recipe Card
Want just the essential recipe details without scrolling through the article? Get our printable recipe card with just the ingredients and instructions.
Loved This Recipe?
If you're looking for more simple, healthy dinners your family will actually eat, grab my FREE 7-Day Easy Dinner Reset. You'll get 7 easy dinner recipes, simple grocery lists, and a done-for-you plan that takes the stress out of mealtime.