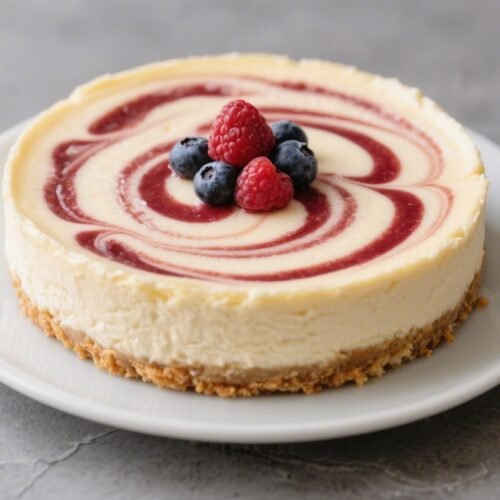
Low-Calorie Berry Swirl Cheesecake – Light, Creamy, and Very Satisfying
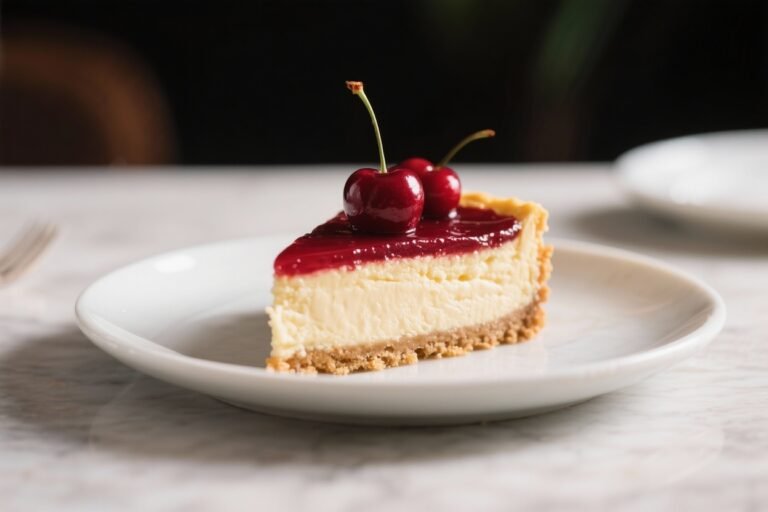
This cheesecake brings the best of both worlds: a rich, creamy texture with a bright berry swirl, all without the heavy calorie load. It’s the kind of dessert you can serve at a gathering and feel good about. The crust is crisp, the filling is smooth, and the berries add a fresh pop of flavor.
Never wonder what's for dinner again.
Get 7 healthy, family-friendly dinners complete with recipes, grocery lists, and simple meal plans delivered straight to your inbox.
If you love cheesecake but want something lighter, this version checks all the boxes. No complicated steps, just a reliable recipe that turns out beautifully every time.
Low-Calorie Berry Swirl Cheesecake - Light, Creamy, and Very Satisfying
Ingredients
- For the Berry Swirl: 1 1/2 cups mixed berries (fresh or frozen), such as raspberries, strawberries, and blueberries
- 2 tablespoons water
- 2–3 tablespoons granulated sweetener (sugar or zero-calorie sweetener), to taste
- 1 teaspoon lemon juice
- 1 teaspoon cornstarch mixed with 2 teaspoons water (slurry)
- For the Crust: 1 1/2 cups light graham cracker crumbs (or digestive biscuit crumbs)
- 3 tablespoons melted light butter or coconut oil
- 1 1/2 tablespoons granulated sweetener
- Pinch of salt
- For the Cheesecake Filling: 16 ounces reduced-fat cream cheese (Neufchâtel), room temperature
- 1 cup nonfat or 2% plain Greek yogurt, room temperature
- 1/2 cup granulated sweetener (sugar or baking-friendly zero-calorie blend)
- 2 large eggs, room temperature
- 1 large egg white, room temperature
- 1 tablespoon lemon juice
- 1 teaspoon vanilla extract
- 1 tablespoon cornstarch
- 1/4 teaspoon fine salt
- Optional: zest of 1 lemon for brightness
Instructions
- Prep the pan and oven. Heat the oven to 325°F (163°C). Line a 9-inch springform pan with parchment on the bottom. Lightly spray the sides. Wrap the outside of the pan with foil to protect from any leaks if using a water bath.
- Make the berry swirl. Add berries, water, sweetener, and lemon juice to a small saucepan over medium heat. Cook 5–7 minutes, stirring, until berries break down. Stir in the cornstarch slurry and simmer 1 minute until thickened. Cool to room temperature, then blend or mash smooth. Set aside.
- Build the crust. Stir graham crumbs, melted butter, sweetener, and salt until evenly moistened. Press firmly into an even layer in the pan, going slightly up the sides. Bake 8–10 minutes, then cool while you make the filling.
- Mix the filling gently. In a large bowl, beat cream cheese with sweetener on low-medium just until smooth, about 1 minute. Add Greek yogurt, lemon juice, vanilla, cornstarch, salt, and optional zest; mix on low until combined. Add eggs and egg white one at a time, mixing on low and scraping the bowl as needed. Do not overmix; too much air causes cracks.
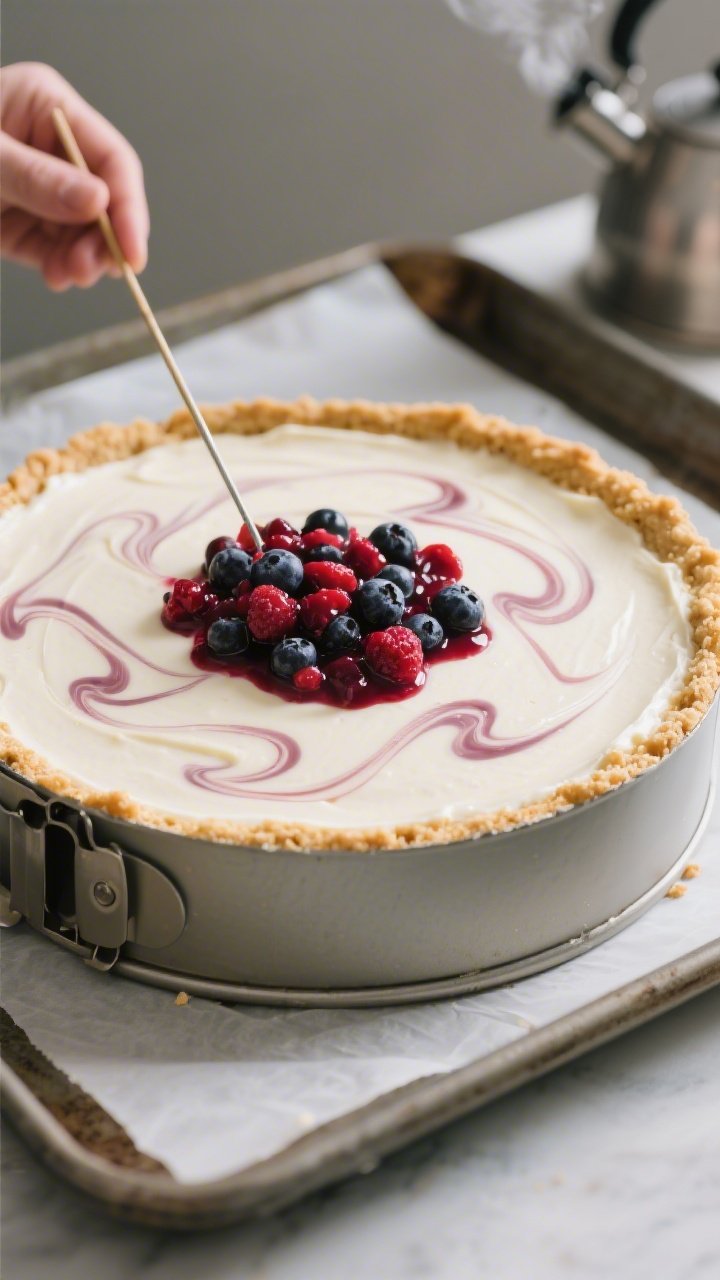
- Assemble the cheesecake. Pour the filling over the cooled crust and smooth the top. Dollop spoonfuls of the berry sauce over the surface (you may not need it all). Use a skewer or butter knife to swirl gently, keeping the pattern on top without digging deep.
- Bake low and slow. Place the springform pan in a larger roasting pan and pour hot water into the roasting pan to reach halfway up the sides of the springform (optional but helps prevent cracks). Bake 45–55 minutes. The edges should be set while the center still jiggles slightly like Jell-O.
- Cool gradually. Turn off the oven, crack the door, and let the cheesecake sit for 30 minutes. Remove from the oven, take it out of the water bath, and cool on a rack until room temperature.
- Chill to set. Cover and refrigerate at least 6 hours, preferably overnight. This step is key for a clean, creamy slice.
- Serve. Run a thin knife around the edge to loosen, then release the springform. Slice with a warm, clean knife. Add a small drizzle of leftover berry sauce on plates if you like.
What Makes This Special

This cheesecake keeps calories in check by using a smart mix of reduced-fat cream cheese and Greek yogurt while still tasting indulgent. The berry swirl is made from real berries, not syrup, so you get natural sweetness and color.
The crust uses lightened ingredients that stay crisp and sturdy. Best of all, it sets up cleanly and slices well, making it a great make-ahead dessert for any occasion.
Ingredients
- For the Berry Swirl:
- 1 1/2 cups mixed berries (fresh or frozen), such as raspberries, strawberries, and blueberries
- 2 tablespoons water
- 2–3 tablespoons granulated sweetener (sugar or zero-calorie sweetener), to taste
- 1 teaspoon lemon juice
- 1 teaspoon cornstarch mixed with 2 teaspoons water (slurry)
- For the Crust:
- 1 1/2 cups light graham cracker crumbs (or digestive biscuit crumbs)
- 3 tablespoons melted light butter or coconut oil
- 1 1/2 tablespoons granulated sweetener
- Pinch of salt
- For the Cheesecake Filling:
- 16 ounces reduced-fat cream cheese (Neufchâtel), room temperature
- 1 cup nonfat or 2% plain Greek yogurt, room temperature
- 1/2 cup granulated sweetener (sugar or baking-friendly zero-calorie blend)
- 2 large eggs, room temperature
- 1 large egg white, room temperature
- 1 tablespoon lemon juice
- 1 teaspoon vanilla extract
- 1 tablespoon cornstarch
- 1/4 teaspoon fine salt
- Optional: zest of 1 lemon for brightness
How to Make It
- Prep the pan and oven. Heat the oven to 325°F (163°C). Line a 9-inch springform pan with parchment on the bottom.
Lightly spray the sides. Wrap the outside of the pan with foil to protect from any leaks if using a water bath.
- Make the berry swirl. Add berries, water, sweetener, and lemon juice to a small saucepan over medium heat. Cook 5–7 minutes, stirring, until berries break down.
Stir in the cornstarch slurry and simmer 1 minute until thickened. Cool to room temperature, then blend or mash smooth. Set aside.
- Build the crust. Stir graham crumbs, melted butter, sweetener, and salt until evenly moistened.
Press firmly into an even layer in the pan, going slightly up the sides. Bake 8–10 minutes, then cool while you make the filling.
- Mix the filling gently. In a large bowl, beat cream cheese with sweetener on low-medium just until smooth, about 1 minute. Add Greek yogurt, lemon juice, vanilla, cornstarch, salt, and optional zest; mix on low until combined.
Add eggs and egg white one at a time, mixing on low and scraping the bowl as needed. Do not overmix; too much air causes cracks.
- Assemble the cheesecake. Pour the filling over the cooled crust and smooth the top. Dollop spoonfuls of the berry sauce over the surface (you may not need it all). Use a skewer or butter knife to swirl gently, keeping the pattern on top without digging deep.
- Bake low and slow. Place the springform pan in a larger roasting pan and pour hot water into the roasting pan to reach halfway up the sides of the springform (optional but helps prevent cracks).
Bake 45–55 minutes. The edges should be set while the center still jiggles slightly like Jell-O.
- Cool gradually. Turn off the oven, crack the door, and let the cheesecake sit for 30 minutes. Remove from the oven, take it out of the water bath, and cool on a rack until room temperature.
- Chill to set. Cover and refrigerate at least 6 hours, preferably overnight.
This step is key for a clean, creamy slice.
- Serve. Run a thin knife around the edge to loosen, then release the springform. Slice with a warm, clean knife. Add a small drizzle of leftover berry sauce on plates if you like.
Storage Instructions
- Refrigerator: Store covered for up to 5 days.
Keep it well wrapped to prevent fridge odors from affecting flavor.
- Freezer: Freeze slices on a tray until firm, then wrap individually and place in a freezer bag for up to 2 months. Thaw overnight in the fridge.
- Make-ahead tip: Bake the cheesecake 1–2 days before serving for the best texture and cleaner cuts.
Health Benefits
- Lower in calories and fat: Using reduced-fat cream cheese and Greek yogurt trims calories without sacrificing creaminess.
- Protein boost: Greek yogurt adds extra protein, helping with satiety and portion control.
- Real fruit, real fiber: The berry swirl brings antioxidants, vitamin C, and a touch of fiber with natural color and flavor.
- Balanced sweetness: Using a baking-friendly, zero-calorie sweetener reduces added sugar while keeping taste intact.
What Not to Do
- Don’t overmix the batter. Extra air leads to cracks and a spongy texture.
- Don’t skip room-temperature ingredients. Cold dairy clumps and won’t blend smoothly.
- Don’t overbake. A fully firm center means it’s overdone. A slight jiggle is perfect.
- Don’t cut while warm. Warm cheesecake collapses.
Chill thoroughly for neat slices.
- Don’t pour hot berry sauce on top. Let it cool so it swirls cleanly and doesn’t thin the batter.
Recipe Variations
- No-bake option: Use a crust with finely crushed grahams and a bit more melted butter, then chill to set. Swap eggs for 1/2 cup whipped topping folded into the cream cheese-yogurt base with gelatin for structure. Still swirl in a cooled, thickened berry sauce.
- Gluten-free crust: Use gluten-free graham crackers or almond flour.
For almond flour, combine 1 1/2 cups almond flour, 2 1/2 tablespoons sweetener, a pinch of salt, and 3–4 tablespoons melted butter; par-bake until lightly golden.
- Different berries: Try all raspberries for tang, or blackberries for deeper color. Strain the sauce if you prefer a seed-free swirl.
- Citrus twist: Add orange zest and a tablespoon of orange juice to the filling and swirl with raspberry sauce for a creamsicle vibe.
- Chocolate marbled: Swirl in 2–3 tablespoons melted, cooled dark chocolate for a low-sugar chocolate-berry effect.
- Mini cheesecakes: Divide crust and filling into a lined muffin tin. Bake 16–20 minutes.
Great for portion control.
FAQ
Can I use full-fat cream cheese?
Yes. It will be richer and slightly firmer. If you’re not strictly counting calories, it’s a reliable swap that still works with the same method.
Need More Easy Dinner Ideas?
Get my FREE 7-Day Easy Dinner Reset and enjoy a full week of healthy dinners without the meal-planning stress.
What sweetener works best?
A baking-friendly zero-calorie sweetener that measures like sugar works well.
You can also use regular sugar or a blend. Taste the batter and the berry sauce to adjust sweetness before baking.
Do I need a water bath?
It’s optional but helpful. The steam keeps the texture silky and reduces cracking.
If you skip it, place a pan of hot water on a lower rack and avoid overbaking.
Why did my cheesecake crack?
Common causes are overmixing, overbaking, or rapid cooling. Keep the mixer on low, pull it while the center still jiggles, and cool gradually in the oven with the door cracked.
Can I use frozen berries?
Absolutely. No need to thaw completely.
Cook them down with sweetener, then thicken with a little cornstarch and cool before swirling.
How do I get clean slices?
Chill overnight, then use a sharp knife dipped in hot water and wiped clean between cuts. This prevents drag and keeps the berry swirl sharp.
Is this suitable for diabetics?
If you use a zero-calorie sweetener and watch your portion size, it can fit into many meal plans. Always check with a healthcare provider for personal guidance.
Can I make it dairy-free?
You can try dairy-free cream cheese and a thick dairy-free yogurt alternative.
Texture may vary slightly, so chill well to help it set.
What pan size can I use?
A 9-inch springform is standard. An 8-inch pan will make a taller cheesecake and may require extra baking time. For a 10-inch pan, start checking earlier since it will be thinner.
How long does it last?
Up to 5 days in the fridge and 2 months in the freezer.
Keep it well wrapped to maintain freshness and prevent freezer burn.
Final Thoughts
This Low-Calorie Berry Swirl Cheesecake brings all the creamy, tangy satisfaction you want, with a light touch that keeps it weeknight-friendly. It’s simple enough for beginners but polished enough for guests. Follow the gentle mixing, careful bake, and proper chill, and you’ll get a smooth, crack-free finish.
Keep a few slices in the freezer for a ready-to-go treat that doesn’t blow your goals.
Printable Recipe Card
Want just the essential recipe details without scrolling through the article? Get our printable recipe card with just the ingredients and instructions.
Loved This Recipe?
If you're looking for more simple, healthy dinners your family will actually eat, grab my FREE 7-Day Easy Dinner Reset. You'll get 7 easy dinner recipes, simple grocery lists, and a done-for-you plan that takes the stress out of mealtime.