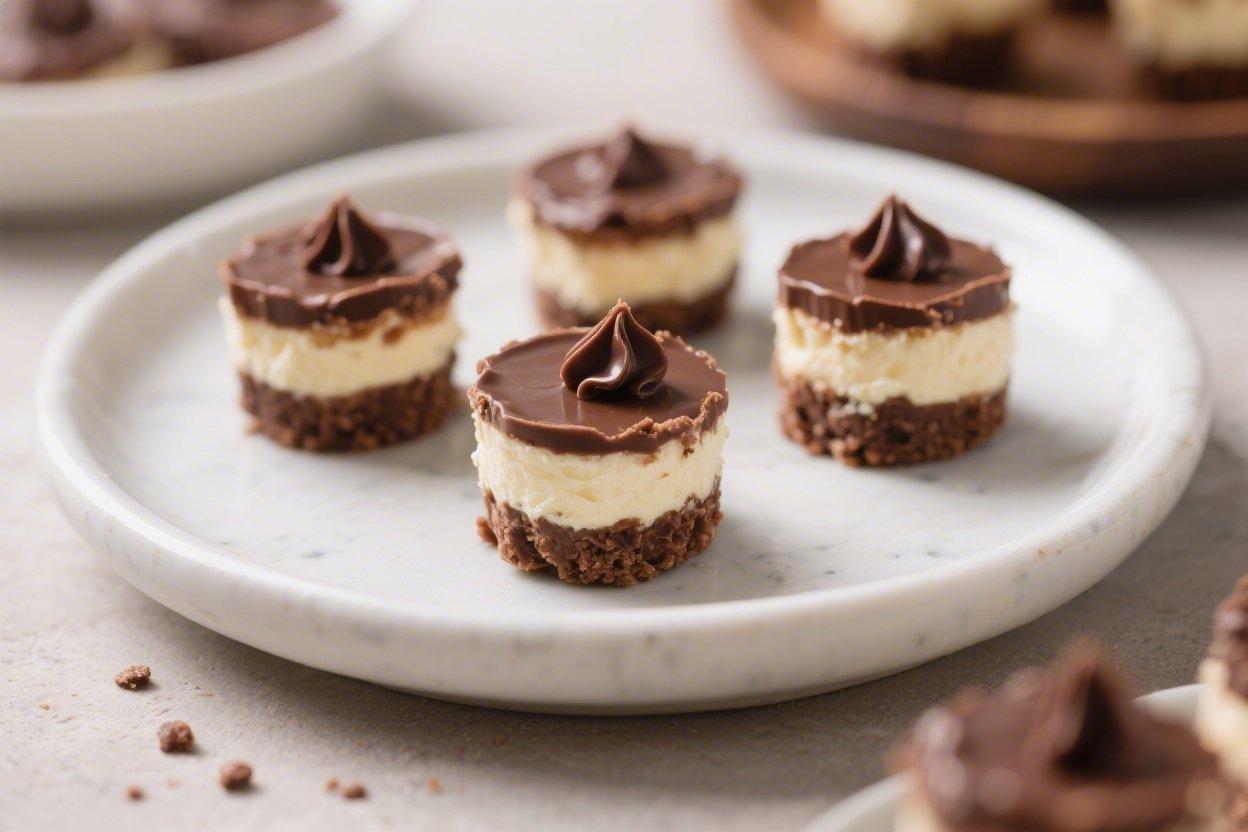
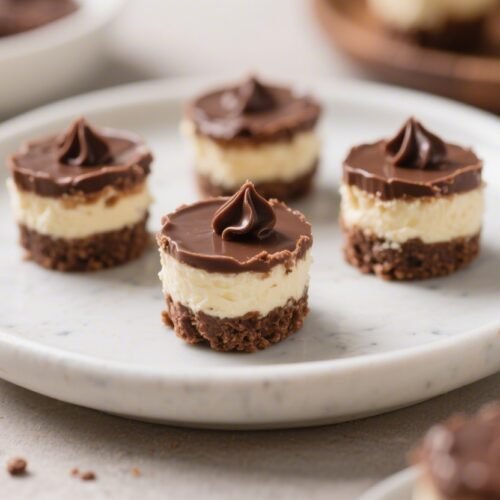
No-Bake Chocolate Protein Cheesecake Bites – Rich, Creamy, and Ready Fast
These little bites taste like dessert but work like a snack. They’re creamy, chocolatey, and surprisingly light, with a nice boost of protein to keep you satisfied. No oven, no water bath, no fuss—just mix, chill, and enjoy.
Never wonder what's for dinner again.
Get 7 healthy, family-friendly dinners complete with recipes, grocery lists, and simple meal plans delivered straight to your inbox.
They’re perfect for meal prep, after-dinner cravings, or a quick treat between meetings. If you love cheesecake but want something easier and lighter, these are for you.
No-Bake Chocolate Protein Cheesecake Bites – Rich, Creamy, and Ready Fast
Ingredients
- For the crust:
- 1 1/2 cups chocolate cookie crumbs (or chocolate graham cracker crumbs)
- 3 tablespoons melted coconut oil or unsalted butter
- 1 tablespoon maple syrup or honey (optional, for extra binding)
- Pinch of salt
- For the filling:
- 8 ounces reduced-fat cream cheese, softened
- 3/4 cup plain Greek yogurt (2% or 0%)
- 1/2 cup chocolate or vanilla whey or plant-based protein powder
- 1/4 cup unsweetened cocoa powder
- 1/3–1/2 cup powdered sugar or powdered sweetener of choice, to taste
- 2 teaspoons pure vanilla extract
- 1/4 teaspoon fine salt
- 2–3 tablespoons milk (dairy or non-dairy), as needed for texture
- Optional: 2 ounces dark chocolate, melted, for extra richness
- For topping (optional):
- Mini chocolate chips or shaved dark chocolate
- Flaky sea salt
- Fresh raspberries or sliced strawberries
- Tools: Mini muffin pan, paper liners or silicone cups, mixing bowls, hand mixer or whisk, spatula, small cookie scoop
Instructions
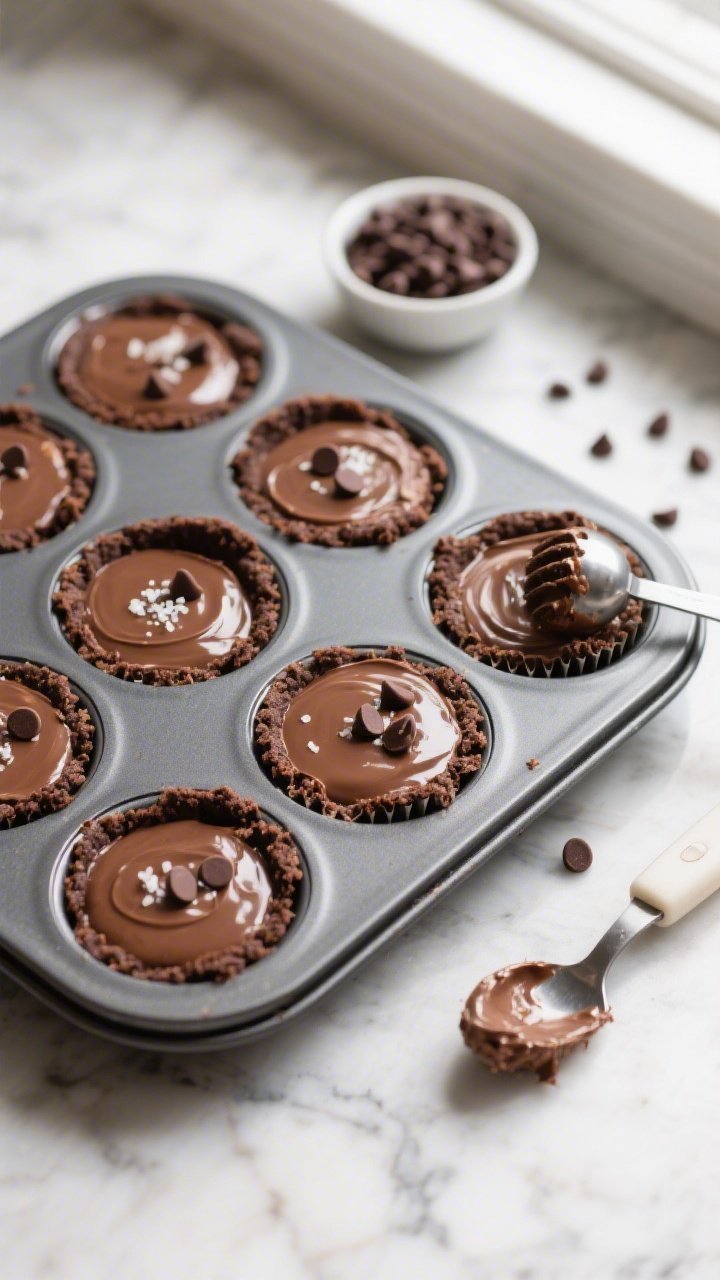
- Prep the pan. Line a mini muffin pan with paper liners or use silicone cups. This makes removing the bites easy and keeps the crust intact.
- Make the crust. In a bowl, stir together the chocolate cookie crumbs, melted coconut oil or butter, maple syrup (if using), and a pinch of salt until the mixture looks like damp sand and holds when pressed.
- Press and set. Divide the crust mixture among the cups (about 1 heaping teaspoon each). Press firmly with the back of a spoon to form an even base. Place the pan in the freezer while you make the filling.
- Beat the cream cheese. In a separate bowl, beat the softened cream cheese with a hand mixer until smooth and fluffy, about 1–2 minutes. Scrape the bowl.
- Add yogurt and flavorings. Mix in the Greek yogurt, vanilla, and salt until silky and well combined.
- Blend in the dry ingredients. Add protein powder, cocoa powder, and powdered sugar. Start on low speed to avoid a puff of powder, then increase speed until smooth. If the mixture is too thick, add milk 1 tablespoon at a time. The filling should be creamy and spoonable, not runny.
- Optional chocolate boost. If using melted dark chocolate, let it cool slightly, then beat it into the filling for extra richness.
- Fill the cups. Remove the chilled crusts from the freezer. Spoon or scoop the filling over each crust, smoothing the tops with the back of a spoon. Tap the pan gently to level.
- Chill to set. Refrigerate for at least 2 hours, or freeze for 45–60 minutes, until firm enough to peel from the liners cleanly.
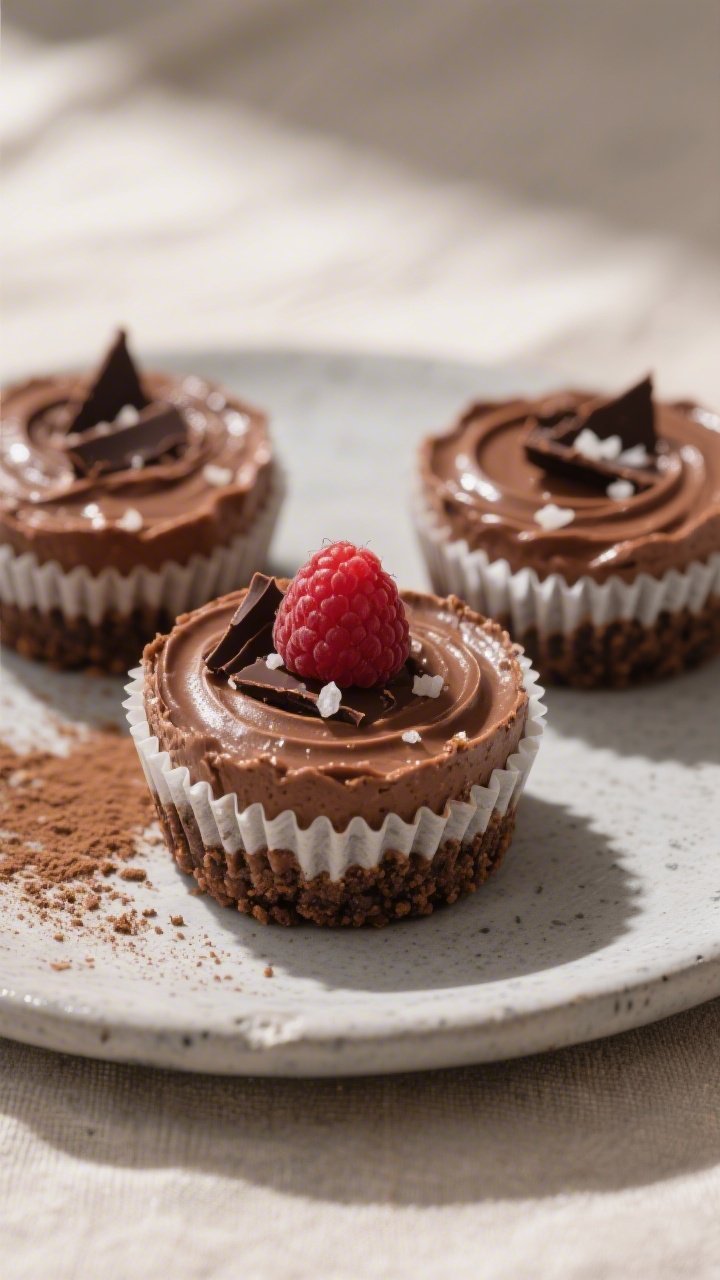
- Finish and serve. Add mini chocolate chips, fruit, or a pinch of flaky salt. Enjoy straight from the fridge for the best texture.
Why This Recipe Works
This recipe blends cream cheese and Greek yogurt for that classic cheesecake tang without the heaviness. Protein powder adds structure and sweetness while boosting nutrition, so you don’t need much added sugar.
A simple, no-bake cocoa cookie base gives you a firm, crunchy contrast to the silky filling. Because the bites chill in a mini muffin pan, they set quickly and portion themselves. You get the flavor and texture of cheesecake in a fraction of the time.
What You’ll Need
- For the crust:
- 1 1/2 cups chocolate cookie crumbs (or chocolate graham cracker crumbs)
- 3 tablespoons melted coconut oil or unsalted butter
- 1 tablespoon maple syrup or honey (optional, for extra binding)
- Pinch of salt
- For the filling:
- 8 ounces reduced-fat cream cheese, softened
- 3/4 cup plain Greek yogurt (2% or 0%)
- 1/2 cup chocolate or vanilla whey or plant-based protein powder
- 1/4 cup unsweetened cocoa powder
- 1/3–1/2 cup powdered sugar or powdered sweetener of choice, to taste
- 2 teaspoons pure vanilla extract
- 1/4 teaspoon fine salt
- 2–3 tablespoons milk (dairy or non-dairy), as needed for texture
- Optional: 2 ounces dark chocolate, melted, for extra richness
- For topping (optional):
- Mini chocolate chips or shaved dark chocolate
- Flaky sea salt
- Fresh raspberries or sliced strawberries
- Tools: Mini muffin pan, paper liners or silicone cups, mixing bowls, hand mixer or whisk, spatula, small cookie scoop
How to Make It
- Prep the pan. Line a mini muffin pan with paper liners or use silicone cups.
This makes removing the bites easy and keeps the crust intact.
- Make the crust. In a bowl, stir together the chocolate cookie crumbs, melted coconut oil or butter, maple syrup (if using), and a pinch of salt until the mixture looks like damp sand and holds when pressed.
- Press and set. Divide the crust mixture among the cups (about 1 heaping teaspoon each). Press firmly with the back of a spoon to form an even base. Place the pan in the freezer while you make the filling.
- Beat the cream cheese. In a separate bowl, beat the softened cream cheese with a hand mixer until smooth and fluffy, about 1–2 minutes.
Scrape the bowl.
- Add yogurt and flavorings. Mix in the Greek yogurt, vanilla, and salt until silky and well combined.
- Blend in the dry ingredients. Add protein powder, cocoa powder, and powdered sugar. Start on low speed to avoid a puff of powder, then increase speed until smooth. If the mixture is too thick, add milk 1 tablespoon at a time.
The filling should be creamy and spoonable, not runny.
- Optional chocolate boost. If using melted dark chocolate, let it cool slightly, then beat it into the filling for extra richness.
- Fill the cups. Remove the chilled crusts from the freezer. Spoon or scoop the filling over each crust, smoothing the tops with the back of a spoon. Tap the pan gently to level.
- Chill to set. Refrigerate for at least 2 hours, or freeze for 45–60 minutes, until firm enough to peel from the liners cleanly.
- Finish and serve. Add mini chocolate chips, fruit, or a pinch of flaky salt.
Enjoy straight from the fridge for the best texture.
How to Store
- Refrigerator: Keep in an airtight container for up to 5 days. Layer with parchment to prevent sticking.
- Freezer: Freeze on a sheet pan until solid, then transfer to a freezer bag. Store up to 2 months.
Thaw in the fridge for 30–60 minutes before eating.
- Travel: Pack with an ice pack if taking to work or the gym. They soften at room temp in about 20 minutes.
Health Benefits
- Higher protein, fewer cravings: Protein from Greek yogurt and protein powder helps keep you full and supports muscle recovery.
- Lighter than traditional cheesecake: Using yogurt and reduced-fat cream cheese cuts calories and saturated fat while keeping the creamy texture.
- Customizable sweetness: You control the sugar level and can use lower-sugar sweeteners if you prefer.
- Portion control built in: Bite-size servings help manage portions without feeling deprived.
Common Mistakes to Avoid
- Using cold cream cheese: Cold cream cheese won’t blend smoothly and can leave lumps. Soften it at room temperature first.
- Over-thinning the filling: Add milk slowly.
Too much liquid prevents the bites from setting firmly.
- Skipping the chill time: The filling needs time to set. Rushing this step makes removal messy and the texture too soft.
- Packing a crumbly crust: If the crust won’t hold, add another teaspoon of melted fat or a touch more syrup until it presses together.
- Using gritty sweeteners: Granulated sugar can feel sandy. Use powdered sugar or a powdered sweetener for a smooth finish.
Variations You Can Try
- Mocha Cheesecake Bites: Add 1–2 teaspoons instant espresso powder to the filling.
- Peanut Butter Swirl: Warm 3 tablespoons natural peanut butter and swirl into the tops before chilling.
- Mint Chocolate: Add 1/4 teaspoon peppermint extract and top with crushed cocoa nibs.
- Salted Caramel: Drizzle with a light layer of caramel sauce and finish with flaky salt.
- Gluten-Free: Use gluten-free chocolate cookies for the crust.
- Dairy-Free: Swap in dairy-free cream cheese, coconut yogurt, and plant-based protein powder.
Use coconut oil for the crust.
- High-Protein Boost: Add 2 extra tablespoons of protein powder and 1–2 teaspoons more milk to balance texture.
FAQ
Can I make these without protein powder?
Yes. Replace the protein powder with 1/4 cup additional cocoa powder and 2–3 tablespoons powdered sugar to taste. The texture will be slightly softer and the protein content lower, but they’ll still set nicely.
Need More Easy Dinner Ideas?
Get my FREE 7-Day Easy Dinner Reset and enjoy a full week of healthy dinners without the meal-planning stress.
Which protein powder works best?
Whey isolate blends smoothly and sets well.
Casein gives a thicker, almost mousse-like texture. For dairy-free, choose a finely milled plant-based powder like pea or a pea-rice blend. Avoid gritty powders or those with strong aftertastes.
How can I make them sweeter without adding much sugar?
Use a flavored protein powder and add vanilla extract.
You can also use powdered erythritol, allulose, or a monk fruit blend. Start with less and adjust to taste.
My crust is falling apart. What should I do?
Add another teaspoon of melted coconut oil or butter and mix well.
Press more firmly into the cups, and chill an extra 10 minutes before adding the filling.
Can I make a full-size cheesecake with this recipe?
Yes, but you’ll need to double the crust and filling for a 9-inch springform pan. Line the bottom with parchment, press in the crust, spread the filling, and chill 6–8 hours or overnight for clean slices.
How many bites does this make?
Expect about 24 mini bites, depending on how generously you fill each cup. For larger muffin cups, you’ll get 10–12.
Can I skip the crust?
Yes.
Spoon the filling into silicone cups or small ramekins and chill. You’ll get a lighter, crustless cheesecake bite with fewer calories.
What if I don’t have a mixer?
Use a sturdy whisk and softened cream cheese. Mix longer to avoid lumps.
If needed, pass the filling through a fine-mesh sieve for an ultra-smooth texture.
How do I get clean edges when removing the liners?
Chill until very firm, then peel the liner away slowly rather than pulling the bite out. If the room is warm, freeze the bites for 10 minutes before unwrapping.
Can I add collagen instead of protein powder?
You can add 1–2 tablespoons of collagen for a small protein boost, but it won’t thicken the filling like protein powder. Keep some cocoa and powdered sugar for structure and taste.
Final Thoughts
No-Bake Chocolate Protein Cheesecake Bites deliver creamy, rich flavor with simple steps and better-for-you ingredients.
They’re easy to prep, easy to portion, and easy to love. Keep a batch in the fridge or freezer, and you’ll always have a satisfying treat ready when cravings hit. Customize the flavors, tweak the sweetness, and make them your own.
Dessert and snack just became the same thing—in the best way.
Printable Recipe Card
Want just the essential recipe details without scrolling through the article? Get our printable recipe card with just the ingredients and instructions.
Loved This Recipe?
If you're looking for more simple, healthy dinners your family will actually eat, grab my FREE 7-Day Easy Dinner Reset. You'll get 7 easy dinner recipes, simple grocery lists, and a done-for-you plan that takes the stress out of mealtime.