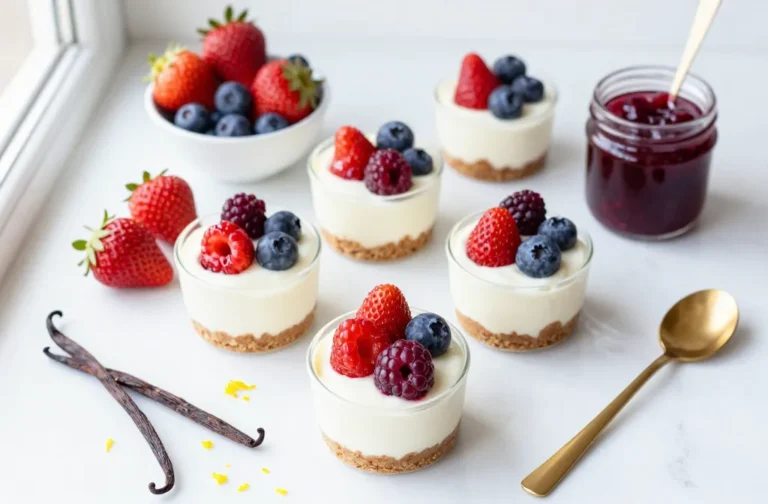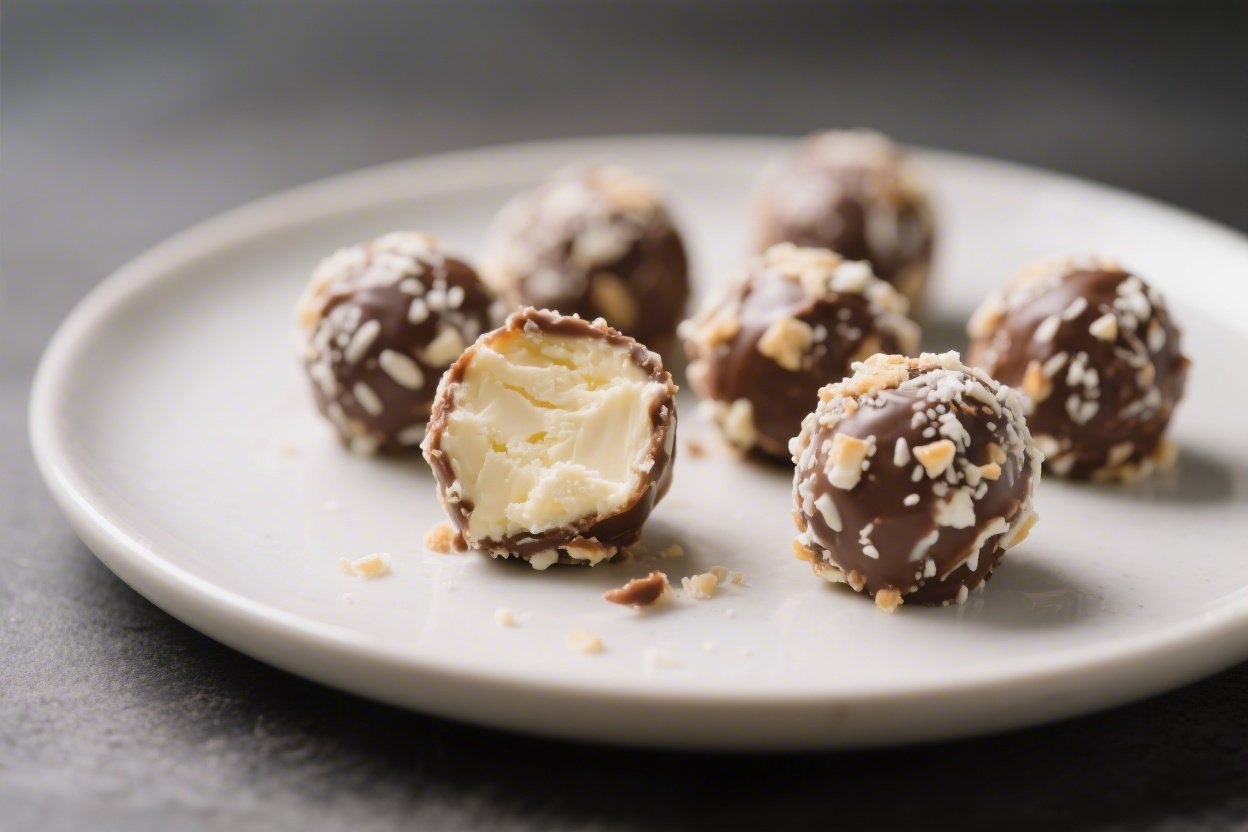
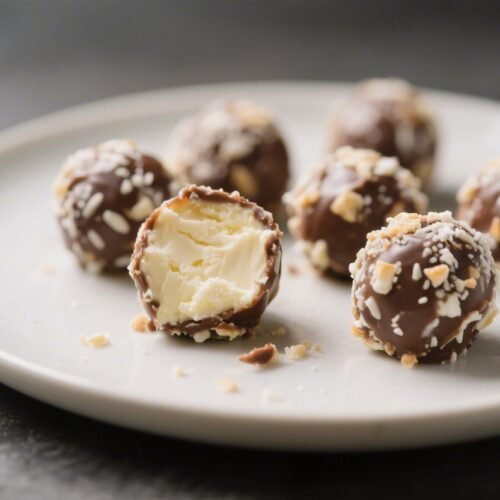
No Bake Protein Cheesecake Balls – A Quick, Creamy Snack You’ll Want on Repeat
Creamy cheesecake flavor without turning on the oven? Yes, please. These No Bake Protein Cheesecake Balls are rich, tangy, and satisfyingly sweet, but still light enough to keep you feeling good.
Never wonder what's for dinner again.
Get 7 healthy, family-friendly dinners complete with recipes, grocery lists, and simple meal plans delivered straight to your inbox.
They come together in minutes, use simple pantry ingredients, and chill into perfect bite-sized treats. Whether you need a post-workout snack, a lunchbox boost, or a dessert that won’t derail your goals, these little bites deliver.
No Bake Protein Cheesecake Balls – A Quick, Creamy Snack You’ll Want on Repeat
Ingredients
- Cream cheese (8 oz/225 g, softened; regular or light)
- Greek yogurt (1/2 cup; plain, 2% or 0%)
- Vanilla whey or plant-based protein powder (3/4 cup; pick a brand you like)
- Sweetener to taste (2–4 tbsp): maple syrup, honey, or powdered sweetener
- Vanilla extract (1 tsp)
- Lemon zest (1 tsp; optional but adds cheesecake tang)
- Pinch of fine salt
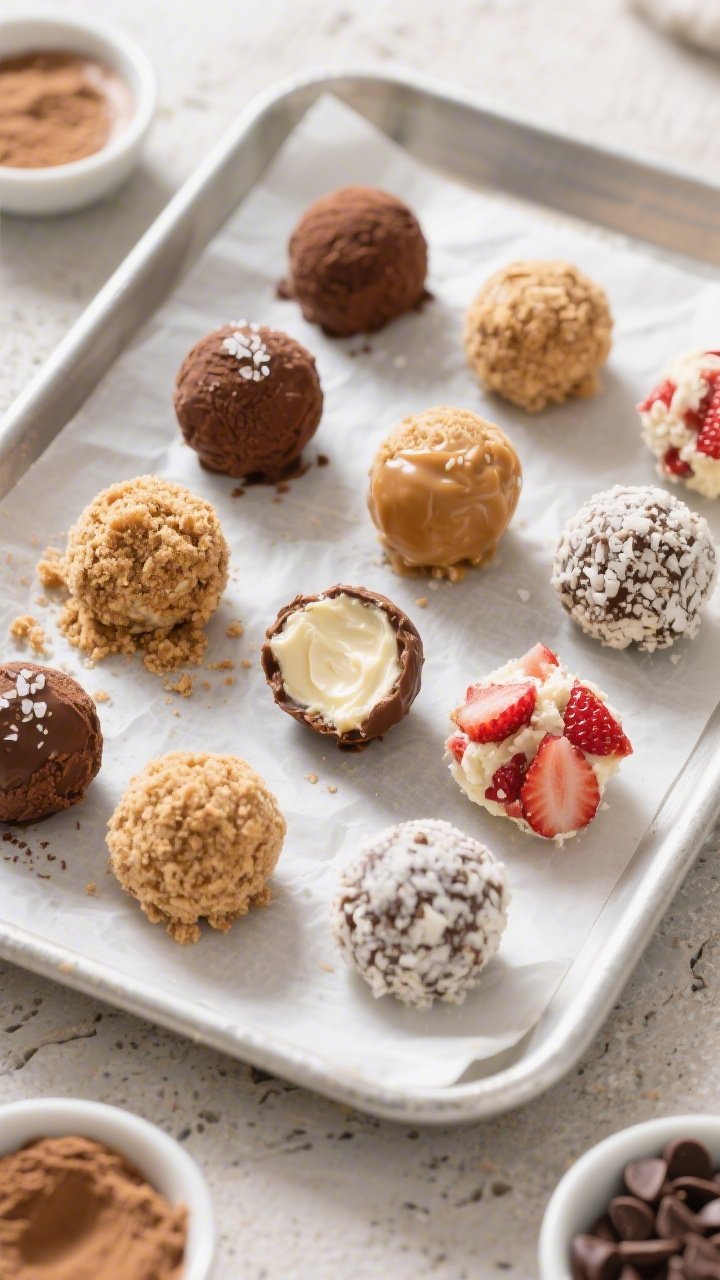
- Coatings (choose 1–3): finely crushed graham crackers, almond flour, unsweetened shredded coconut, cocoa powder, crushed freeze-dried berries, mini chocolate chips, or sprinkles
Instructions
- Soften the base: Let the cream cheese sit at room temperature for 20–30 minutes so it blends smoothly. Cold cream cheese can make the mixture lumpy.
- Mix the wet ingredients: In a medium bowl, beat the cream cheese until smooth. Add Greek yogurt, vanilla extract, lemon zest, and the pinch of salt. Stir until creamy and uniform.
- Add sweetener: Start with 2 tablespoons of your chosen sweetener. You can always add more later, but it’s tough to take sweetness away once it’s in.
- Fold in protein powder: Sprinkle the protein powder over the mixture and fold gently with a spatula. Avoid overmixing—it can make the dough tough or dry. You’re aiming for a thick, scoopable batter.
- Adjust texture: If the mixture is too sticky or loose, add 1 tablespoon of protein powder at a time. If it’s too dry, add 1 teaspoon of yogurt or milk. The final texture should roll into balls without sticking heavily to your hands.
- Chill briefly: Cover and refrigerate for 20–30 minutes. Chilling makes it easier to roll clean, firm balls.
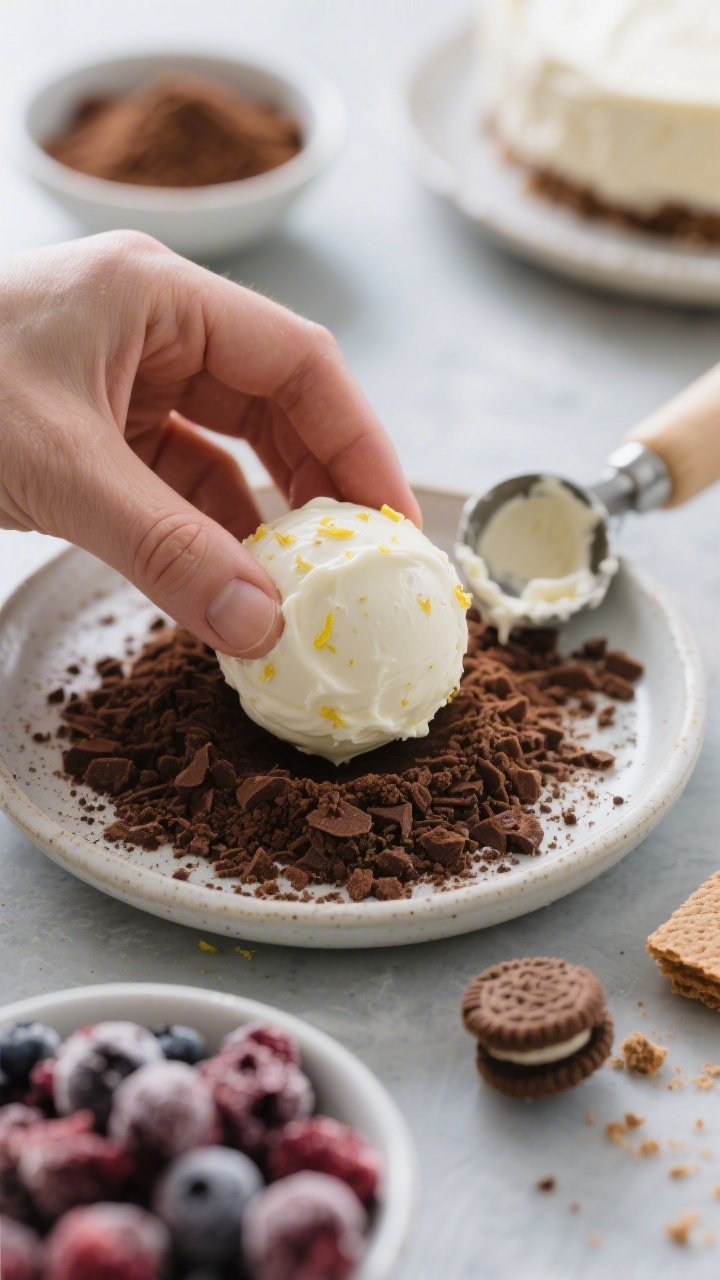
- Roll into balls: Scoop about 1 tablespoon per ball (a small cookie scoop works well). Roll between your palms to form smooth rounds.
- Coat and set: Roll each ball in your chosen coating. Place on a parchment-lined tray.
- Final chill: Refrigerate for at least 1 hour, or freeze for 20–30 minutes until set. The flavor deepens and the texture firms up as they chill.
- Serve: Enjoy chilled. For the creamiest bite, let frozen balls sit at room temperature for 5–10 minutes before eating.
What Makes This Special
Think classic cheesecake flavor, but with a protein-forward twist and a texture that’s soft yet slightly chewy. There’s no baking, no water baths, and no fuss—just mix, roll, and chill.
They’re customizable with coatings like graham crumbs, cocoa, or crushed freeze-dried fruit, so each batch can feel new. Best of all, they’re low-lift and make-ahead, so your freezer does the work while you get a week’s worth of snacks.
Shopping List
- Cream cheese (8 oz/225 g, softened; regular or light)
- Greek yogurt (1/2 cup; plain, 2% or 0%)
- Vanilla whey or plant-based protein powder (3/4 cup; pick a brand you like)
- Sweetener to taste (2–4 tbsp): maple syrup, honey, or powdered sweetener
- Vanilla extract (1 tsp)
- Lemon zest (1 tsp; optional but adds cheesecake tang)
- Pinch of fine salt
- Coatings (choose 1–3): finely crushed graham crackers, almond flour, unsweetened shredded coconut, cocoa powder, crushed freeze-dried berries, mini chocolate chips, or sprinkles
How to Make It
- Soften the base: Let the cream cheese sit at room temperature for 20–30 minutes so it blends smoothly. Cold cream cheese can make the mixture lumpy.
- Mix the wet ingredients: In a medium bowl, beat the cream cheese until smooth.
Add Greek yogurt, vanilla extract, lemon zest, and the pinch of salt. Stir until creamy and uniform.
- Add sweetener: Start with 2 tablespoons of your chosen sweetener. You can always add more later, but it’s tough to take sweetness away once it’s in.
- Fold in protein powder: Sprinkle the protein powder over the mixture and fold gently with a spatula.
Avoid overmixing—it can make the dough tough or dry. You’re aiming for a thick, scoopable batter.
- Adjust texture: If the mixture is too sticky or loose, add 1 tablespoon of protein powder at a time. If it’s too dry, add 1 teaspoon of yogurt or milk.
The final texture should roll into balls without sticking heavily to your hands.
- Chill briefly: Cover and refrigerate for 20–30 minutes. Chilling makes it easier to roll clean, firm balls.
- Roll into balls: Scoop about 1 tablespoon per ball (a small cookie scoop works well). Roll between your palms to form smooth rounds.
- Coat and set: Roll each ball in your chosen coating.
Place on a parchment-lined tray.
- Final chill: Refrigerate for at least 1 hour, or freeze for 20–30 minutes until set. The flavor deepens and the texture firms up as they chill.
- Serve: Enjoy chilled. For the creamiest bite, let frozen balls sit at room temperature for 5–10 minutes before eating.
Storage Instructions
Store the balls in an airtight container in the refrigerator for up to 5 days.
Separate layers with parchment if you’ve used sticky coatings.
For longer storage, freeze for up to 2 months. Freeze on a tray first, then transfer to a freezer bag to prevent sticking. Thaw in the fridge overnight or at room temperature for 10–15 minutes before serving.
Health Benefits
- Protein-packed: With protein powder, Greek yogurt, and cream cheese, each ball offers a steady source of protein for satiety and muscle recovery.
- Lower in sugar (if you choose wisely): Using minimal sweetener—or a powdered sugar alternative—keeps the sugar load in check while still tasting dessert-like.
- Probiotics from yogurt: Greek yogurt can contribute live cultures that support a healthy gut, depending on the brand.
- Smart fats: Cream cheese provides fat that helps you feel full.
Using a light version can reduce overall calories without losing the creamy feel.
- Customizable for dietary needs: Go gluten-free with almond flour or coconut coatings, dairy-free with plant-based alternatives, or nut-free with graham crumbs or cocoa.
Common Mistakes to Avoid
- Using cold cream cheese: It won’t blend smoothly and can leave lumps. Soften first for a creamy base.
- Overloading protein powder: Too much powder creates a chalky, dry texture. Add gradually and stop when the dough is scoopable.
- Skipping the chill: Warm dough sticks and flattens.
Chilling helps the balls keep their shape and improves flavor.
- Choosing a protein you don’t like: The flavor of your powder really shows here. Use one you enjoy on its own.
- Heavy, wet coatings: Avoid wet coatings (like syrups) that make the surface gooey. Stick to dry crumbs, cocoa, or finely chopped add-ins.
Variations You Can Try
- Lemon Blueberry: Add 1 tablespoon lemon juice, extra zest, and fold in 2 tablespoons finely chopped dried blueberries.
Coat in crushed freeze-dried blueberries or almond flour.
- Cookies & Cream: Use vanilla or cookies-and-cream protein and fold in 2 tablespoons crushed chocolate sandwich cookies. Coat in fine graham or a cookie crumb blend.
- Chocolate Truffle: Swap vanilla protein for chocolate, add 1 tablespoon cocoa powder, and coat in cocoa or mini chocolate chips.
- Strawberry Cheesecake: Stir in 1–2 tablespoons powdered freeze-dried strawberries. Coat in more strawberry powder for a pop of color and flavor.
- Salted Caramel: Use caramel-flavored protein and a drizzle (1 teaspoon) of caramel or a caramel-flavored sweetener.
Finish with a tiny pinch of flaky salt on top.
- Dairy-Free: Use dairy-free cream cheese, coconut yogurt, and a plant-based protein powder. If needed, add 1–2 teaspoons coconut oil to help them set firmly.
FAQ
Need More Easy Dinner Ideas?
Get my FREE 7-Day Easy Dinner Reset and enjoy a full week of healthy dinners without the meal-planning stress.
Can I make these without protein powder?
Yes. Replace the protein powder with 1/2 cup finely ground almond flour or oat flour, then add more as needed to reach a rollable texture.
You’ll lose some protein, but the flavor and texture will still be great.
What if my mixture is too sticky to roll?
Add 1 tablespoon of protein powder or almond flour at a time, stirring gently. Chill for 10–20 minutes and try rolling again. Lightly damp hands can also help prevent sticking.
Which protein powder works best?
Whey blends tend to create the creamiest texture.
Plant-based powders work too, but can be more absorbent. Start with less and adjust slowly so the mixture doesn’t dry out.
Can I reduce the calories?
Use light cream cheese, nonfat Greek yogurt, and a calorie-free powdered sweetener. Choose lighter coatings like cocoa powder instead of chocolate chips.
Portion size also helps—aim for teaspoon-sized bites for a smaller treat.
Do they taste like cheesecake?
Yes, especially with vanilla, a bit of lemon zest, and a graham-style coating. They’re not identical to a baked cheesecake slice, but they deliver that tangy, creamy profile in a snackable form.
How many balls does this make?
Expect about 18–22 balls using a tablespoon scoop, depending on how big you roll them and the brand of protein powder.
Can I add collagen instead of protein powder?
You can add a scoop of collagen for an extra boost, but it won’t thicken like protein powder. Combine collagen with almond flour or a smaller amount of protein powder to keep the mixture firm.
Are these safe to leave at room temperature?
Keep them chilled.
Because they contain dairy, they should not sit out for more than 1–2 hours. Store in the fridge and remove right before serving.
In Conclusion
No Bake Protein Cheesecake Balls hit that sweet spot between dessert and smart snacking. They’re simple, quick, and endlessly flexible, with a creamy texture that feels indulgent without the oven or extra effort.
Keep a batch in your fridge or freezer, switch up the coatings, and enjoy a reliable treat that fits your day—whether it’s post-gym, mid-afternoon, or after dinner.
Printable Recipe Card
Want just the essential recipe details without scrolling through the article? Get our printable recipe card with just the ingredients and instructions.
Loved This Recipe?
If you're looking for more simple, healthy dinners your family will actually eat, grab my FREE 7-Day Easy Dinner Reset. You'll get 7 easy dinner recipes, simple grocery lists, and a done-for-you plan that takes the stress out of mealtime.