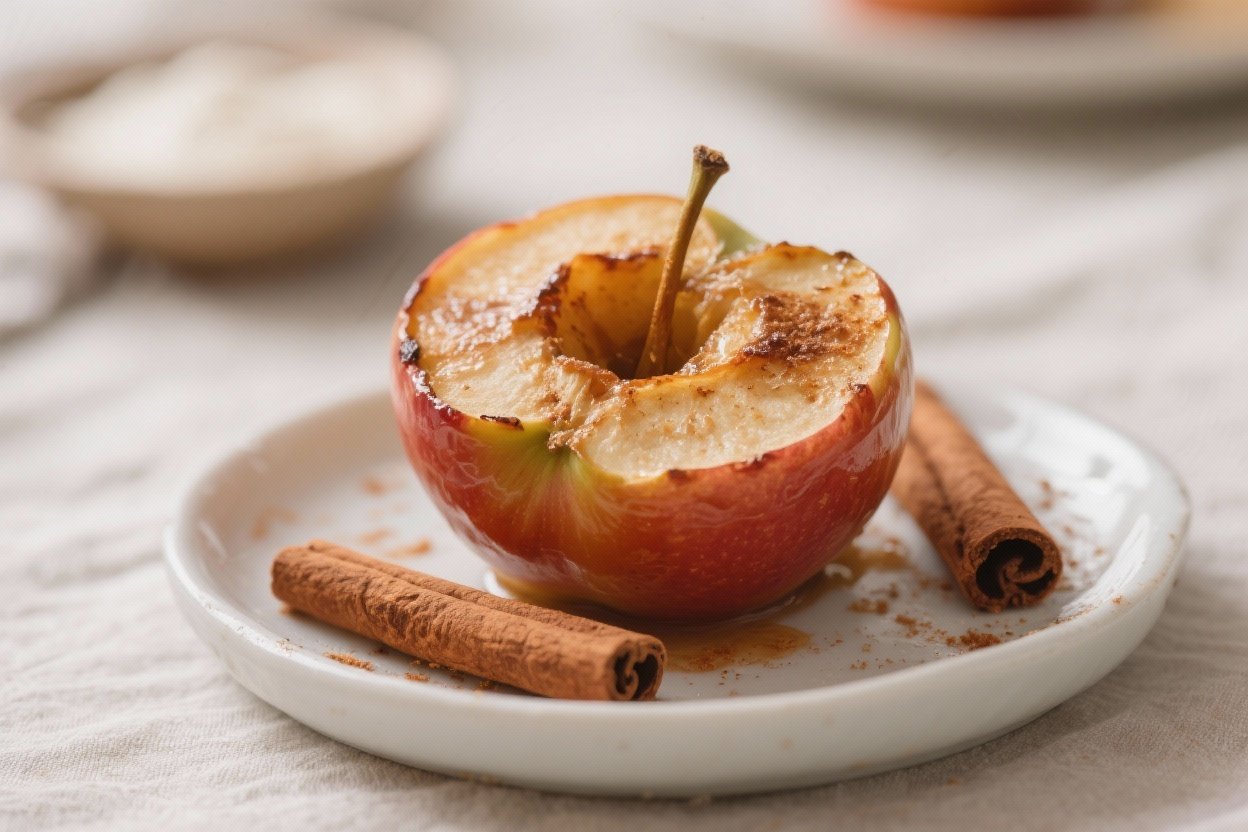
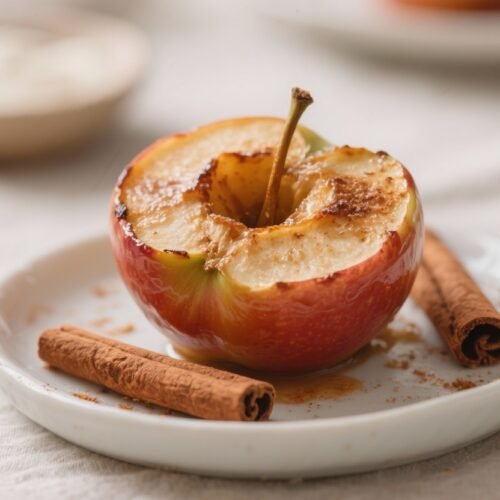
Baked Cinnamon Apples – Simple, Cozy, and Comforting
These baked cinnamon apples are the kind of dessert that makes your whole home smell warm and welcoming. They’re soft, gently sweet, and full of spiced flavor without being heavy. You don’t need fancy equipment or special skills—just a baking dish, a few pantry basics, and some good apples.
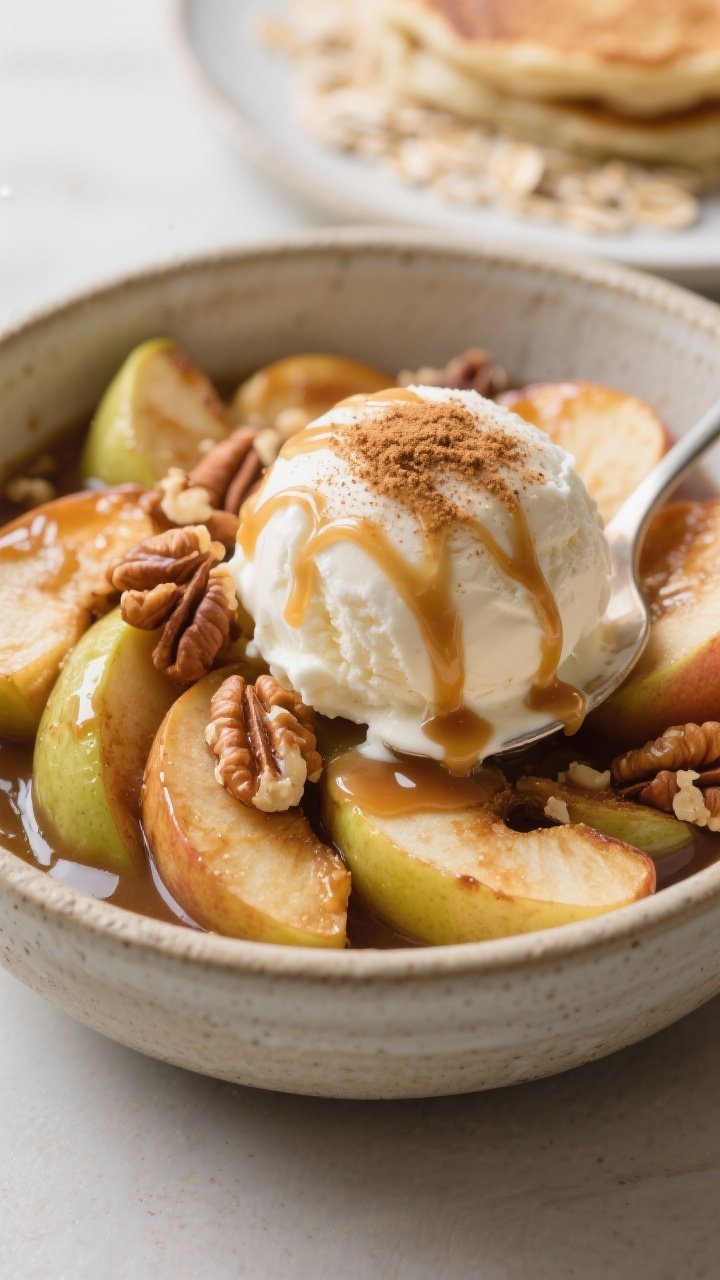
Enjoy them on their own, spooned over oatmeal, or topped with ice cream when you want something extra cozy.
Baked Cinnamon Apples - Simple, Cozy, and Comforting
Ingredients
- 6 medium apples (about 2 to 2.5 pounds). Good choices: Honeycrisp, Pink Lady, Granny Smith, or a mix.
- 3 tablespoons unsalted butter, melted.
- 1/3 cup brown sugar (light or dark). Adjust to taste.
- 1 1/2 teaspoons ground cinnamon.
- 1/4 teaspoon ground nutmeg (optional, but lovely).
- 1 teaspoon vanilla extract.
- 1 tablespoon cornstarch (or 2 teaspoons flour) to thicken the sauce.
- 2 tablespoons water or apple cider.
- Pinch of salt to balance the sweetness.
- Optional add-ins: 1/3 cup chopped pecans or walnuts, a handful of raisins, or a splash of bourbon.
Instructions
- Preheat and prep: Heat the oven to 350°F (175°C). Lightly butter a 9x13-inch baking dish or similar.
- Slice the apples: Peel if you prefer (not required), core, and slice into 1/2-inch wedges. Thicker slices hold their shape better.
- Mix the sauce: In a bowl, whisk melted butter, brown sugar, cinnamon, nutmeg, vanilla, cornstarch, water or cider, and a pinch of salt until smooth.
- Combine: Add apple slices to the baking dish. Pour the sauce over and toss to coat evenly. Stir in nuts or raisins if using.
- Bake: Cover the dish with foil and bake for 20 minutes. Remove the foil, stir gently, and bake uncovered for another 20–25 minutes, until the apples are tender and the sauce thickens and bubbles.
- Rest: Let the apples sit for 5–10 minutes. The sauce will thicken a bit more as it cools.
- Serve: Enjoy warm. Great with vanilla ice cream, whipped cream, Greek yogurt, or over pancakes and oatmeal.
Overeating is a pattern. This helps you fix that problem. A quick reset for cravings, snacking, and “I’ll start tomorrow” moments.
Built for busy home cooks who want real-life structure. Simple steps that fit meal prep, family dinners, and late-night snack attacks.
What Makes This Recipe So Good
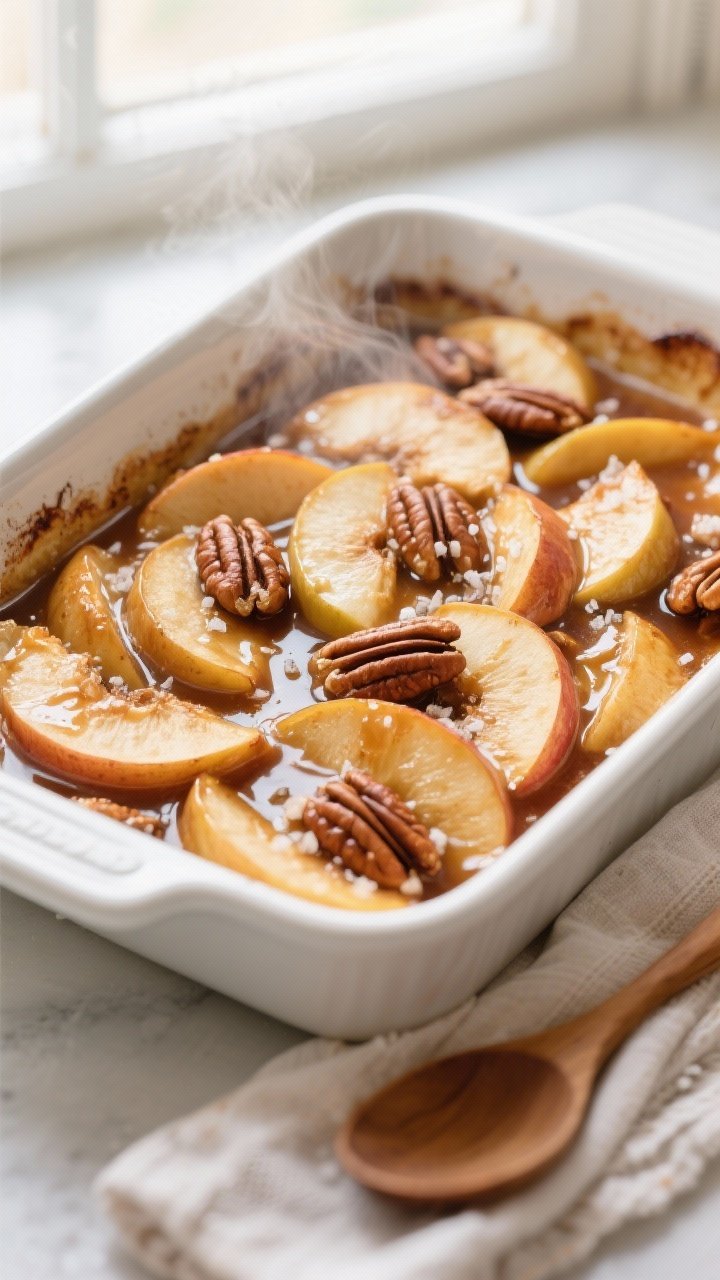
- Simple ingredients, big flavor: Cinnamon, butter, sugar, and apples—classic and comforting.
- Perfect texture: Tender apples that hold their shape, with a glossy, syrupy sauce.
- Flexible sweetness: Adjust the sugar to your taste or swap it with honey or maple syrup.
- Easy to scale: Make a small batch for two or a big batch for a crowd without extra steps.
- Great for any time: Dessert, snack, or breakfast topper—it works everywhere.
What You’ll Need
- 6 medium apples (about 2 to 2.5 pounds). Good choices: Honeycrisp, Pink Lady, Granny Smith, or a mix.
- 3 tablespoons unsalted butter, melted.
- 1/3 cup brown sugar (light or dark). Adjust to taste.
- 1 1/2 teaspoons ground cinnamon.
- 1/4 teaspoon ground nutmeg (optional, but lovely).
- 1 teaspoon vanilla extract.
- 1 tablespoon cornstarch (or 2 teaspoons flour) to thicken the sauce.
- 2 tablespoons water or apple cider.
- Pinch of salt to balance the sweetness.
- Optional add-ins: 1/3 cup chopped pecans or walnuts, a handful of raisins, or a splash of bourbon.
How to Make It
- Preheat and prep: Heat the oven to 350°F (175°C).
Lightly butter a 9×13-inch baking dish or similar.
- Slice the apples: Peel if you prefer (not required), core, and slice into 1/2-inch wedges. Thicker slices hold their shape better.
- Mix the sauce: In a bowl, whisk melted butter, brown sugar, cinnamon, nutmeg, vanilla, cornstarch, water or cider, and a pinch of salt until smooth.
- Combine: Add apple slices to the baking dish. Pour the sauce over and toss to coat evenly.
Stir in nuts or raisins if using.
- Bake: Cover the dish with foil and bake for 20 minutes. Remove the foil, stir gently, and bake uncovered for another 20–25 minutes, until the apples are tender and the sauce thickens and bubbles.
- Rest: Let the apples sit for 5–10 minutes. The sauce will thicken a bit more as it cools.
- Serve: Enjoy warm.
Great with vanilla ice cream, whipped cream, Greek yogurt, or over pancakes and oatmeal.
Keeping It Fresh
- Refrigerate: Store in an airtight container for up to 4 days. Cool fully before sealing to avoid condensation.
- Reheat: Warm in a saucepan over low heat or in the microwave in short bursts, stirring between intervals.
- Freeze: You can freeze for up to 2 months. Thaw overnight in the fridge, then reheat gently.
The texture softens slightly but stays tasty.
- Make ahead: Slice apples and toss with a little lemon juice. Keep covered in the fridge for up to 24 hours, then mix with the sauce and bake fresh.

Why This Is Good for You
- Fiber from apples: Apples provide soluble fiber, which supports digestion and helps you feel satisfied.
- Lower in fat: Just a small amount of butter adds richness without being heavy.
- Natural sweetness: Apples carry their own sweetness, so you can reduce added sugar to suit your goals.
- Warm spices: Cinnamon adds flavor without calories and pairs well with fruit-based desserts.
Common Mistakes to Avoid
- Using the wrong apples: Very soft varieties (like Red Delicious) can turn mushy. Choose firm, baking-friendly apples.
- Skipping the thickener: Without cornstarch or flour, the sauce can be watery.
It only takes a little to get that glossy finish.
- Overbaking: The apples should be tender but not collapsing. Start checking around the 35-minute mark.
- Not enough liquid: A bit of water or cider helps melt the sugar and build a sauce. Don’t leave it out.
- Forgetting the salt: A tiny pinch brings out the flavors and balances sweetness.
Alternatives
- No butter: Use coconut oil for a dairy-free version.
It adds a light, cozy aroma.
- Lower sugar: Reduce brown sugar to 2 tablespoons and add 1–2 tablespoons maple syrup for depth.
- Spice swap: Try apple pie spice, cardamom, or a touch of ground ginger for a different vibe.
- Nut-free: Skip the nuts and add oats instead for a crumble-like texture.
- Add protein: Serve with Greek yogurt or cottage cheese for a balanced snack.
- Gluten-free: Stick with cornstarch as your thickener and you’re good to go.
FAQ
Do I have to peel the apples?
No. Peeling is optional. The skins soften in the oven and add texture and color.
If you want a smoother feel, peel them before slicing.
Which apples are best for baking?
Firm, slightly tart apples work best. Honeycrisp, Pink Lady, Granny Smith, Fuji, and Braeburn are all great choices. A mix often gives the best flavor.
Can I make this in a skillet?
Yes.
Sauté the apples with the butter and sugar over medium heat until they soften, then sprinkle in the cornstarch and a splash of water to thicken. Finish with cinnamon and vanilla. The oven version develops deeper flavor, but the skillet works when you’re short on time.
How do I thicken the sauce if it’s runny?
Stir 1 teaspoon cornstarch with 2 teaspoons cold water, then mix it into the hot apples and bake or simmer for a few more minutes.
It will tighten as it cools.
Can I use honey or maple syrup instead of sugar?
Yes. Use 1/4 cup maple syrup or honey and reduce the water slightly. Expect a looser sauce and a different flavor profile—still delicious.
What can I serve with baked cinnamon apples?
Vanilla ice cream, whipped cream, yogurt, pancakes, waffles, French toast, oatmeal, or even pork chops.
They’re very versatile.
How can I make this feel more like a crisp?
Mix 1/2 cup oats with 1 tablespoon melted butter, 1 tablespoon brown sugar, and a pinch of cinnamon. Sprinkle over the apples for the last 15 minutes of baking.
Final Thoughts
Baked cinnamon apples are a reminder that simple food can feel special. With a handful of ingredients and an hour, you get tender fruit, a fragrant kitchen, and a dessert that fits any occasion.
Keep this recipe in your back pocket for busy nights, last-minute guests, or whenever you want something warm and comforting. It’s easy, adaptable, and always welcome at the table.
Printable Recipe Card
Want just the essential recipe details without scrolling through the article? Get our printable recipe card with just the ingredients and instructions.