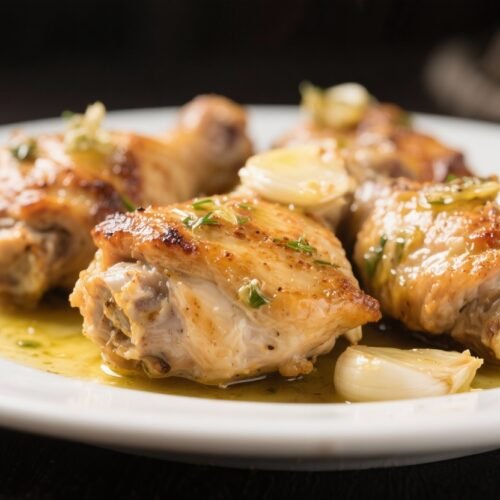
Garlic Butter Chicken Thighs – Juicy, Flavor-Packed, and Weeknight Easy
Few dinners win over a table as quickly as garlic butter chicken thighs. They hit that sweet spot of bold flavor and simple technique with almost no fuss. The crispy skin, the tender meat, and that glossy, garlicky butter sauce make this a repeat recipe.
It’s the kind of meal you pull together on a Tuesday but happily serve to guests on Saturday. With a handful of pantry staples and one skillet, you’ll be set for a richly satisfying dinner.
Garlic Butter Chicken Thighs - Juicy, Flavor-Packed, and Weeknight Easy
Ingredients
- 6 bone-in, skin-on chicken thighs (about 2 to 2.5 pounds)
- Salt and black pepper
- 1 teaspoon smoked paprika (or sweet paprika)
- 1 teaspoon garlic powder
- 1/2 teaspoon onion powder
- 1 tablespoon olive oil
- 4 tablespoons unsalted butter
- 5–6 cloves garlic, minced (or very finely chopped)
- 1/2 teaspoon crushed red pepper flakes (optional)
- 1 tablespoon fresh thyme leaves (or 1 teaspoon dried)
- 1 tablespoon chopped fresh parsley (for serving)
- 1 lemon (zest and juice)
- 1/2 cup low-sodium chicken broth (optional, for a looser sauce)
Instructions
- Preheat and prep: Set your oven to 400°F (200°C). Pat the chicken thighs dry with paper towels until very dry. Dry skin means better browning.
- Season well: In a small bowl, mix salt, pepper, smoked paprika, garlic powder, and onion powder. Sprinkle evenly over both sides of the chicken, focusing extra on the skin.
- Start the sear: Heat a large oven-safe skillet over medium-high. Add olive oil. When it shimmers, place the thighs skin-side down. Don’t crowd the pan—work in batches if needed.
- Crisp the skin: Sear without moving for 6–8 minutes until the skin is deeply golden and crisp. If the skin is browning too fast, lower the heat slightly.
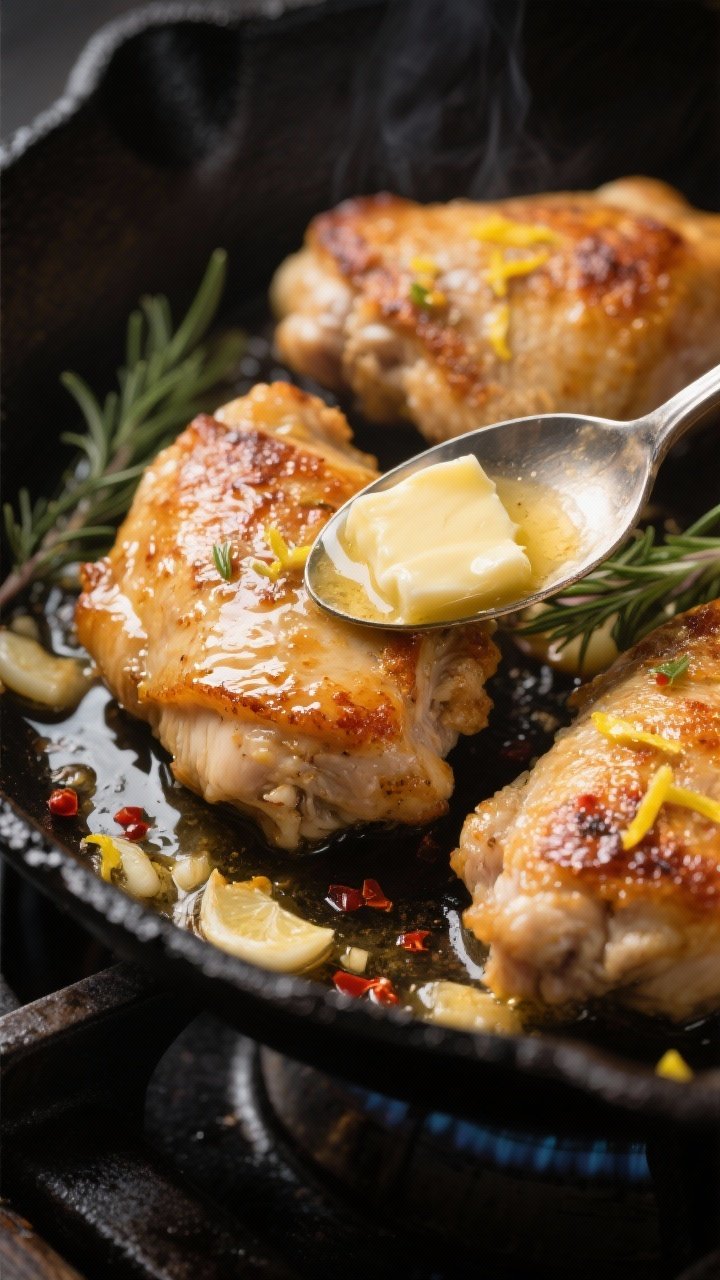
- Flip and add butter: Flip the chicken. Reduce heat to medium. Add butter to the skillet. When it melts and foams, stir in the minced garlic, crushed red pepper (if using), and thyme. Spoon the garlicky butter over the chicken for 1–2 minutes.
- Roast to finish: Transfer the skillet to the oven. Roast 12–15 minutes, or until the thickest part of the thigh reaches 175–195°F for fall-off-the-bone tenderness. If using boneless thighs, start checking at 165°F after about 8–10 minutes.
- Brighten the sauce: Carefully return the skillet to the stovetop over low heat. Zest half the lemon into the pan, then squeeze in about 1 tablespoon lemon juice. If you want more sauce, stir in chicken broth and simmer 1–2 minutes.
- Rest and garnish: Let the chicken rest 5 minutes. Spoon pan sauce over the top. Finish with chopped parsley and a little extra lemon if you like.
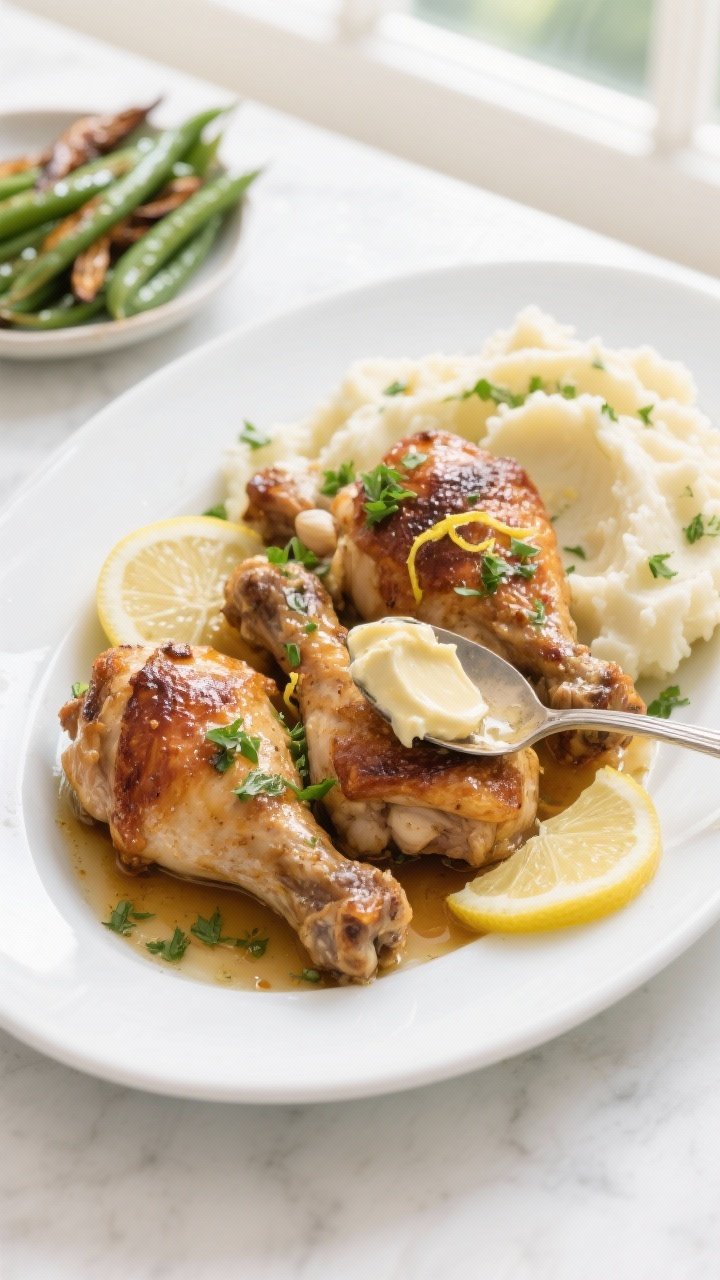
- Serve: Pair with mashed potatoes, rice, buttered noodles, or roasted vegetables. Spoon that garlicky butter over everything.
Overeating is a pattern. This helps you fix that problem. A quick reset for cravings, snacking, and “I’ll start tomorrow” moments.
Built for busy home cooks who want real-life structure. Simple steps that fit meal prep, family dinners, and late-night snack attacks.
What Makes This Recipe So Good
- Deep flavor from simple ingredients: Garlic, butter, and chicken thighs do the heavy lifting. A little lemon and herbs brighten everything up.
- Crispy skin, juicy meat: Starting on the stovetop then finishing in the oven gives you both texture and tenderness.
- Weeknight-friendly: Active time is short, prep is minimal, and cleanup is contained to one skillet.
- Flexible and forgiving: Use fresh or dried herbs, bone-in or boneless thighs, and your favorite sides.
- Restaurant-style pan sauce: A quick butter baste with garlic and lemon creates a glossy, spoonable sauce that tastes fancy without extra effort.
Shopping List
- 6 bone-in, skin-on chicken thighs (about 2 to 2.5 pounds)
- Salt and black pepper
- 1 teaspoon smoked paprika (or sweet paprika)
- 1 teaspoon garlic powder
- 1/2 teaspoon onion powder
- 1 tablespoon olive oil
- 4 tablespoons unsalted butter
- 5–6 cloves garlic, minced (or very finely chopped)
- 1/2 teaspoon crushed red pepper flakes (optional)
- 1 tablespoon fresh thyme leaves (or 1 teaspoon dried)
- 1 tablespoon chopped fresh parsley (for serving)
- 1 lemon (zest and juice)
- 1/2 cup low-sodium chicken broth (optional, for a looser sauce)
How to Make It
- Preheat and prep: Set your oven to 400°F (200°C).
Pat the chicken thighs dry with paper towels until very dry. Dry skin means better browning.
- Season well: In a small bowl, mix salt, pepper, smoked paprika, garlic powder, and onion powder. Sprinkle evenly over both sides of the chicken, focusing extra on the skin.
- Start the sear: Heat a large oven-safe skillet over medium-high.
Add olive oil. When it shimmers, place the thighs skin-side down. Don’t crowd the pan—work in batches if needed.
- Crisp the skin: Sear without moving for 6–8 minutes until the skin is deeply golden and crisp.
If the skin is browning too fast, lower the heat slightly.
- Flip and add butter: Flip the chicken. Reduce heat to medium. Add butter to the skillet.
When it melts and foams, stir in the minced garlic, crushed red pepper (if using), and thyme. Spoon the garlicky butter over the chicken for 1–2 minutes.
- Roast to finish: Transfer the skillet to the oven. Roast 12–15 minutes, or until the thickest part of the thigh reaches 175–195°F for fall-off-the-bone tenderness.
If using boneless thighs, start checking at 165°F after about 8–10 minutes.
- Brighten the sauce: Carefully return the skillet to the stovetop over low heat. Zest half the lemon into the pan, then squeeze in about 1 tablespoon lemon juice. If you want more sauce, stir in chicken broth and simmer 1–2 minutes.
- Rest and garnish: Let the chicken rest 5 minutes.
Spoon pan sauce over the top. Finish with chopped parsley and a little extra lemon if you like.
- Serve: Pair with mashed potatoes, rice, buttered noodles, or roasted vegetables. Spoon that garlicky butter over everything.
Keeping It Fresh
- Storage: Cool completely, then refrigerate in an airtight container for up to 4 days.
Keep the sauce with the chicken to maintain moisture.
- Reheating: Rewarm gently in a skillet over medium-low heat with a splash of broth until heated through, about 6–8 minutes. The oven works too: 325°F, covered, 10–15 minutes.
- Freezing: Freeze cooked thighs with some sauce for up to 2 months. Thaw overnight in the fridge and reheat as above.
Add a squeeze of fresh lemon to revive flavors.

Why This is Good for You
- Protein-rich: Chicken thighs provide high-quality protein that supports muscle and keeps you satisfied.
- Iron and zinc: Dark meat offers more iron and zinc than chicken breast, which supports energy and immune function.
- Healthy fats in balance: While butter adds richness, you control the amount. Pair with veggies and a whole-grain side for a rounded plate.
- Garlic’s perks: Garlic brings antioxidants and big flavor, letting you keep the ingredient list short without sacrificing taste.
Pitfalls to Watch Out For
- Skipping the pat-dry step: Damp skin won’t crisp. Take the extra minute to dry the chicken well.
- Overcrowding the pan: Too many thighs at once steam instead of sear.
Cook in batches for a golden crust.
- Burning the garlic: Add garlic after flipping and reduce the heat. Burnt garlic turns bitter fast.
- Undersalting: Chicken thighs can handle seasoning. Taste the sauce at the end and adjust salt and lemon.
- Stopping at 165°F: Thighs taste best a bit higher.
Aim for 175–195°F for tender, juicy meat that pulls from the bone.
Alternatives
- Boneless, skinless thighs: Cook time shortens. Sear 3–4 minutes per side, then finish in the oven about 6–8 minutes. You’ll miss the crispy skin but still get great flavor.
- Breasts: Use smaller breasts or cut large ones in half horizontally.
Sear 3–4 minutes per side, finish to 160–165°F. Add extra butter and broth to keep them juicy.
- Dairy-free: Swap butter for olive oil or a dairy-free butter. Add a splash of coconut milk for body if you want a creamier sauce.
- Herb swaps: Rosemary, oregano, or sage work well.
For a brighter vibe, add chopped basil at the end off heat.
- Flavor twists: Stir in 1 teaspoon Dijon and 1 teaspoon honey to the sauce, or a splash of white wine instead of broth.
- Air fryer option: Season thighs and air fry skin-side up at 380°F for 18–22 minutes, flipping once, then toss in a quick stovetop garlic-butter sauce.
FAQ
Can I make this ahead?
Yes. Season and sear the chicken up to a day in advance, then finish in the oven when you’re ready to eat. Rewarm the sauce with a splash of broth and a squeeze of lemon to freshen it up.
What skillet works best?
A cast-iron or heavy stainless-steel skillet is ideal.
It holds heat well for a strong sear and can go straight into the oven.
How do I know the garlic won’t burn?
Add it after flipping the chicken and lowering the heat. The butter should foam gently, not sputter aggressively. If it starts browning too fast, pull the pan off the heat for 30 seconds.
Can I reduce the butter?
You can.
Use 2 tablespoons butter and 1 tablespoon olive oil. The sauce will be lighter but still flavorful.
What sides go best?
Mashed potatoes, rice, or orzo soak up the sauce beautifully. For veg, try roasted green beans, broccoli, or a lemony salad.
Is skin-on necessary?
No, but it delivers the best texture.
If you prefer skinless, watch your heat and time closely to keep the meat juicy.
In Conclusion
Garlic butter chicken thighs are the kind of recipe that becomes a habit in the best way. The method is simple, the ingredients are familiar, and the results are reliably delicious. With a golden crust, a bright, garlicky pan sauce, and flexible options, this dish checks every box for a weeknight staple.
Keep the basics, tweak the details, and enjoy a deeply satisfying dinner any night of the week.
Printable Recipe Card
Want just the essential recipe details without scrolling through the article? Get our printable recipe card with just the ingredients and instructions.