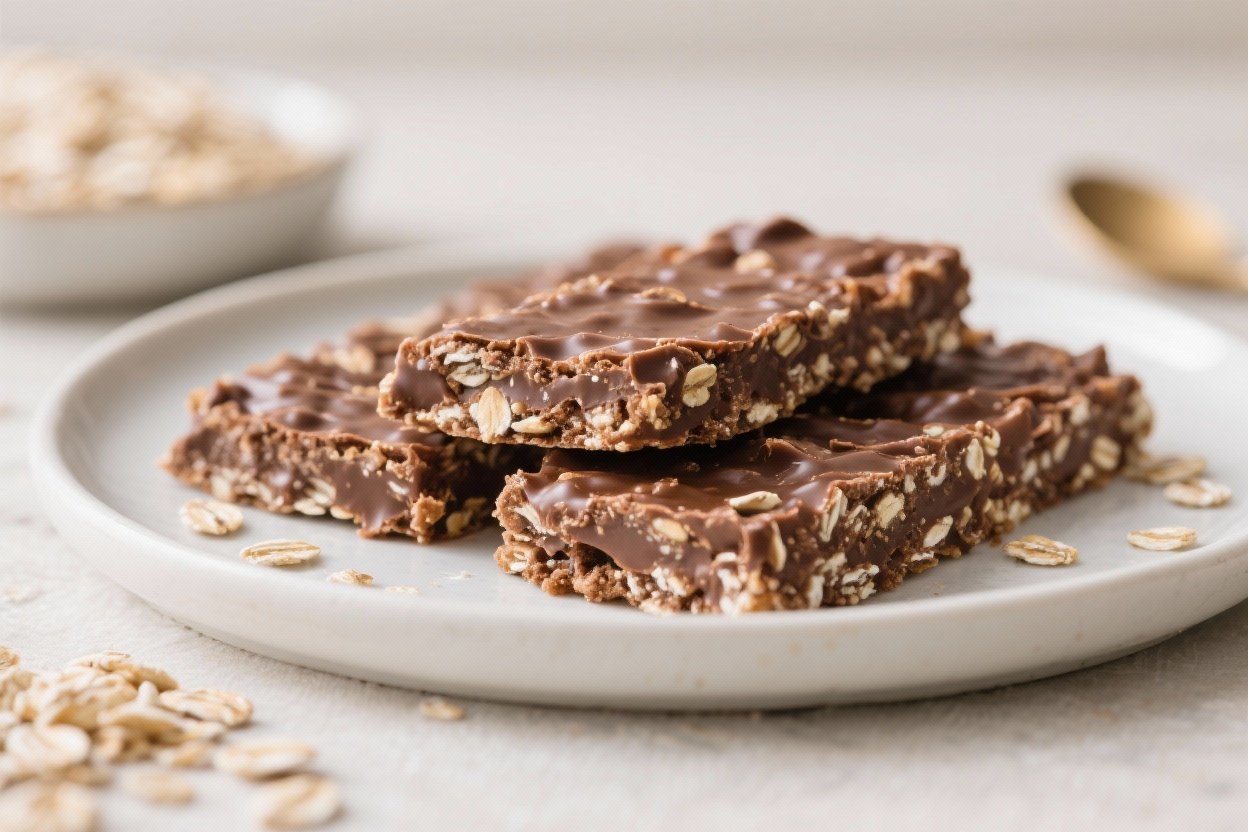
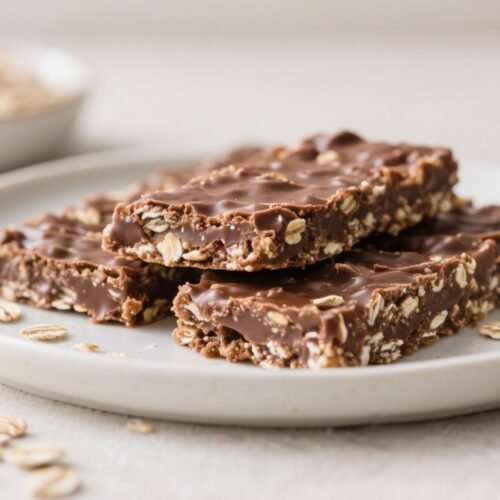
No-Bake Cocoa Oat Bars – Simple, Chewy, and Chocolatey
These No-Bake Cocoa Oat Bars are the kind of recipe you keep in your back pocket for busy days and sweet cravings. They come together quickly on the stovetop, use pantry staples, and set up in the fridge—no oven required. The texture is chewy with a little crunch, and the flavor leans rich and chocolatey without being too sweet.
Make a batch for snack time, a lunchbox treat, or a low-effort dessert. You’ll get consistent results and a reliable treat that stores well.
No-Bake Cocoa Oat Bars - Simple, Chewy, and Chocolatey
Ingredients
- Old-fashioned rolled oats (not quick oats)
- Unsweetened cocoa powder
- Peanut butter (creamy is best)
- Honey or maple syrup (or a mix)
- Brown sugar (light or dark)
- Unsalted butter
- Milk (dairy or unsweetened non-dairy)
- Vanilla extract
- Salt
- Optional add-ins: mini chocolate chips, chopped nuts, shredded coconut, chia seeds, flaxseed meal, or a pinch of cinnamon
Instructions
- Prep the pan. Line an 8x8-inch (20x20 cm) pan with parchment paper, leaving overhang for easy lifting. Lightly mist with oil if you want super clean release.
- Measure oats. Add 3 cups of rolled oats to a large bowl and set aside. If you like a denser bar, lightly crush a cup of the oats with your hands for a tighter texture.
- Make the cocoa syrup. In a medium saucepan over medium heat, combine 6 tablespoons butter, 1/3 cup milk, 1/2 cup brown sugar, 1/3 cup honey (or maple), 1/4 cup unsweetened cocoa powder, and a pinch of salt. Stir constantly until the mixture is smooth and just starts to bubble around the edges.
- Let it simmer briefly. When it reaches a gentle simmer, cook for about 60 seconds, stirring. This helps the sugar dissolve and thickens the syrup slightly. Avoid a rolling boil.
- Add peanut butter and vanilla. Remove from heat. Stir in 3/4 cup creamy peanut butter and 2 teaspoons vanilla until fully melted and glossy.
- Combine with oats. Pour the warm mixture over the oats. Stir well, scraping the bottom, until every oat looks coated. If adding mix-ins like nuts, coconut, or seeds, fold them in now. If using chocolate chips, let the mixture cool 3–4 minutes so they don’t melt completely.
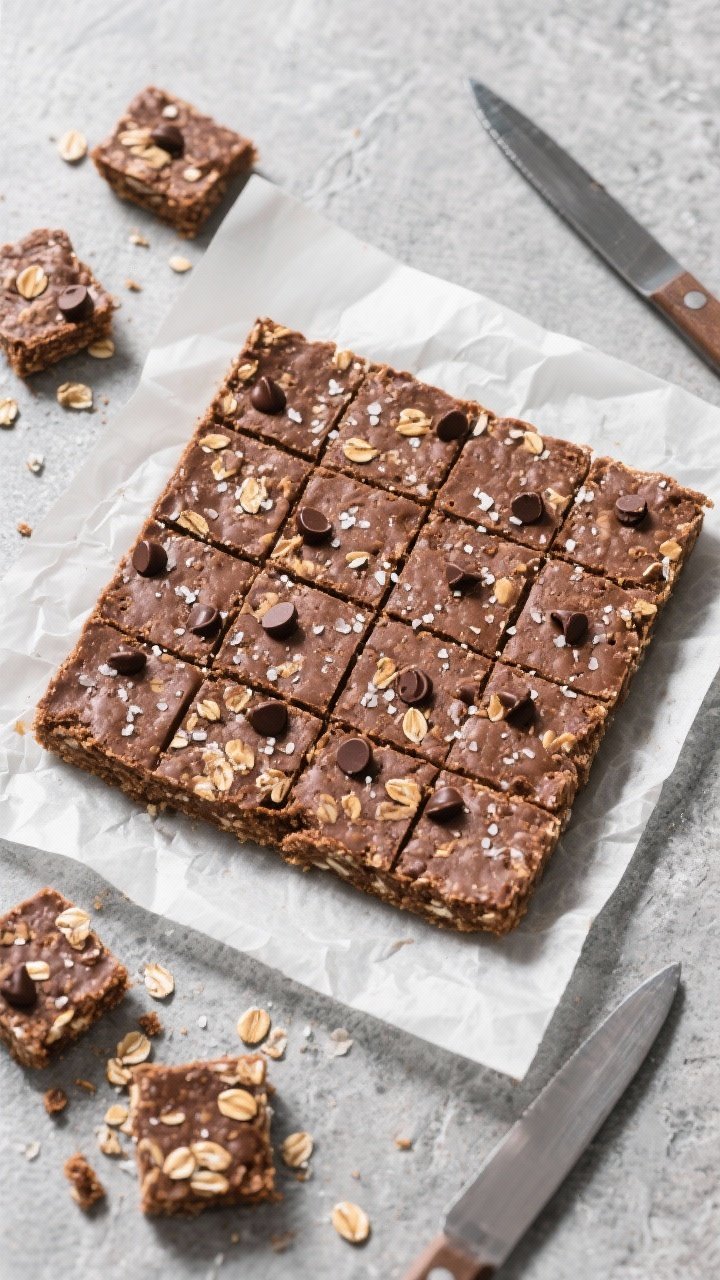
- Press into the pan. Transfer the mixture to the lined pan. Use a spatula or a flat-bottomed measuring cup to press it firmly and evenly into the corners. Firm packing helps the bars set and slice neatly.
- Optional topping. Sprinkle a small handful of mini chocolate chips or flaky salt on top. Gently press so they stick.
- Chill to set. Refrigerate for at least 2 hours, or until firm. For faster setting, place in the freezer for 30–40 minutes.
- Slice and serve. Lift the slab out using the parchment. Cut into 12–16 bars with a sharp knife. Wipe the blade between cuts for clean edges.
Overeating is a pattern. This helps you fix that problem. A quick reset for cravings, snacking, and “I’ll start tomorrow” moments.
Built for busy home cooks who want real-life structure. Simple steps that fit meal prep, family dinners, and late-night snack attacks.
Why This Recipe Works

The base of oats and peanut butter creates a chewy, satisfying texture that holds together without baking. Cocoa powder brings deep chocolate flavor, and a touch of vanilla rounds it out.
Butter and a splash of milk help the mixture meld smoothly on the stovetop, so it spreads easily and sets cleanly. A controlled amount of sweetener ensures these bars taste like dessert without overwhelming the cocoa. The balance of fats, oats, and sweetness means a slice is filling, portable, and not crumbly.
Shopping List
- Old-fashioned rolled oats (not quick oats)
- Unsweetened cocoa powder
- Peanut butter (creamy is best)
- Honey or maple syrup (or a mix)
- Brown sugar (light or dark)
- Unsalted butter
- Milk (dairy or unsweetened non-dairy)
- Vanilla extract
- Salt
- Optional add-ins: mini chocolate chips, chopped nuts, shredded coconut, chia seeds, flaxseed meal, or a pinch of cinnamon
Instructions
- Prep the pan. Line an 8×8-inch (20×20 cm) pan with parchment paper, leaving overhang for easy lifting.
Lightly mist with oil if you want super clean release.
- Measure oats. Add 3 cups of rolled oats to a large bowl and set aside. If you like a denser bar, lightly crush a cup of the oats with your hands for a tighter texture.
- Make the cocoa syrup. In a medium saucepan over medium heat, combine 6 tablespoons butter, 1/3 cup milk, 1/2 cup brown sugar, 1/3 cup honey (or maple), 1/4 cup unsweetened cocoa powder, and a pinch of salt. Stir constantly until the mixture is smooth and just starts to bubble around the edges.
- Let it simmer briefly. When it reaches a gentle simmer, cook for about 60 seconds, stirring.
This helps the sugar dissolve and thickens the syrup slightly. Avoid a rolling boil.
- Add peanut butter and vanilla. Remove from heat. Stir in 3/4 cup creamy peanut butter and 2 teaspoons vanilla until fully melted and glossy.
- Combine with oats. Pour the warm mixture over the oats.
Stir well, scraping the bottom, until every oat looks coated. If adding mix-ins like nuts, coconut, or seeds, fold them in now. If using chocolate chips, let the mixture cool 3–4 minutes so they don’t melt completely.
- Press into the pan. Transfer the mixture to the lined pan.
Use a spatula or a flat-bottomed measuring cup to press it firmly and evenly into the corners. Firm packing helps the bars set and slice neatly.
- Optional topping. Sprinkle a small handful of mini chocolate chips or flaky salt on top. Gently press so they stick.
- Chill to set. Refrigerate for at least 2 hours, or until firm.
For faster setting, place in the freezer for 30–40 minutes.
- Slice and serve. Lift the slab out using the parchment. Cut into 12–16 bars with a sharp knife. Wipe the blade between cuts for clean edges.
Keeping It Fresh
Storage: Store bars in an airtight container with parchment between layers.
They keep at room temperature for 2–3 days in cool weather, or up to a week in the fridge.
Freezing: Wrap individually and freeze for up to 2 months. Thaw at room temperature for 20–30 minutes or enjoy slightly chilled.
Texture tips: If bars dry out, a short microwave burst (5–8 seconds) softens them. If they’re too soft, chill longer or store in the fridge.

Benefits of This Recipe
- No oven needed: Great for hot days or small kitchens.
- Quick to make: About 15 minutes of hands-on time, then chill.
- Pantry-friendly: Uses ingredients you likely have on hand.
- Flexible: Easy to swap sweeteners, nut butters, and mix-ins.
- Naturally whole-grain: Rolled oats add fiber and satisfying chew.
- Kid-friendly: Mildly sweet, chocolatey, and easy to pack.
Pitfalls to Watch Out For
- Overheating the syrup: A hard boil can make the mixture grainy and dry.
Keep it to a gentle simmer.
- Too many dry add-ins: Lots of seeds or coconut can absorb moisture. If you add more than 1 cup total, splash in another tablespoon of milk.
- Using quick oats: They can make bars dense and pasty. Stick to old-fashioned oats for chew.
- Skipping the firm press: Loose packing leads to crumbly bars.
Press firmly, especially at the edges and corners.
- Cutting too soon: Warm bars won’t slice cleanly. Chill until set for neat squares.
Variations You Can Try
- Almond joy style: Swap peanut butter for almond butter, add 1/2 cup shredded coconut, and top with chopped almonds.
- Peanut butter cup: Stir in 1/2 cup mini chocolate chips after the mixture cools slightly; drizzle with melted peanut butter before chilling.
- Mocha twist: Add 1 teaspoon instant espresso powder to the cocoa syrup for a subtle coffee note.
- Salted tahini: Replace peanut butter with tahini, add 1/4 teaspoon extra salt, and finish with flaky salt on top.
- Nut-free option: Use sunflower seed butter and skip nut add-ins. Check that oats are processed in a nut-free facility if needed.
- High-fiber boost: Mix in 2 tablespoons ground flaxseed or chia seeds.
Add an extra tablespoon of milk to keep the mixture pliable.
- Fruit and crunch: Fold in 1/3 cup chopped dried cherries or cranberries and 1/3 cup chopped roasted peanuts or pistachios.
FAQ
Can I make these bars vegan?
Yes. Use dairy-free butter, plant-based milk, and maple syrup instead of honey. Everything else stays the same.
How do I reduce the sugar?
Cut the brown sugar to 1/3 cup and keep the honey or maple at 1/3 cup.
The bars will be less sweet but still hold together. Avoid cutting both at once or the bars may crumble.
Can I use quick oats or steel-cut oats?
Quick oats will change the texture and can get gummy. Steel-cut oats won’t soften enough without cooking.
Old-fashioned rolled oats are the best choice.
What if I don’t like peanut butter?
Use almond butter, cashew butter, or sunflower seed butter. Choose a creamy, well-stirred variety for the smoothest result.
Do I have to refrigerate them?
Chilling helps them set firmly. After that, you can keep them at room temperature if your kitchen is cool.
In warm climates, refrigeration keeps them from getting soft.
My bars are crumbly. What went wrong?
They may need more moisture or firmer packing. Next time, add an extra tablespoon of milk or a bit more peanut butter, and press the mixture firmly into the pan.
Also, be sure the syrup simmered long enough to dissolve the sugar.
How many bars does this make?
An 8×8-inch pan yields 12 to 16 bars, depending on how large you cut them. For snack-size bites, cut into 20 small squares.
Can I double the recipe?
Yes. Use a 9×13-inch pan and increase chilling time by 15–20 minutes.
Make the syrup in a large saucepan to prevent splatter.
In Conclusion
No-Bake Cocoa Oat Bars are simple, reliable, and endlessly adaptable. They check all the boxes for make-ahead snacks and quick desserts, and you don’t need an oven or fancy equipment. With a handful of pantry staples and a few minutes on the stovetop, you’ll have a pan of chewy, chocolatey bars ready to slice and share.
Keep the base recipe as your go-to, and adjust the add-ins to match your mood.
Printable Recipe Card
Want just the essential recipe details without scrolling through the article? Get our printable recipe card with just the ingredients and instructions.