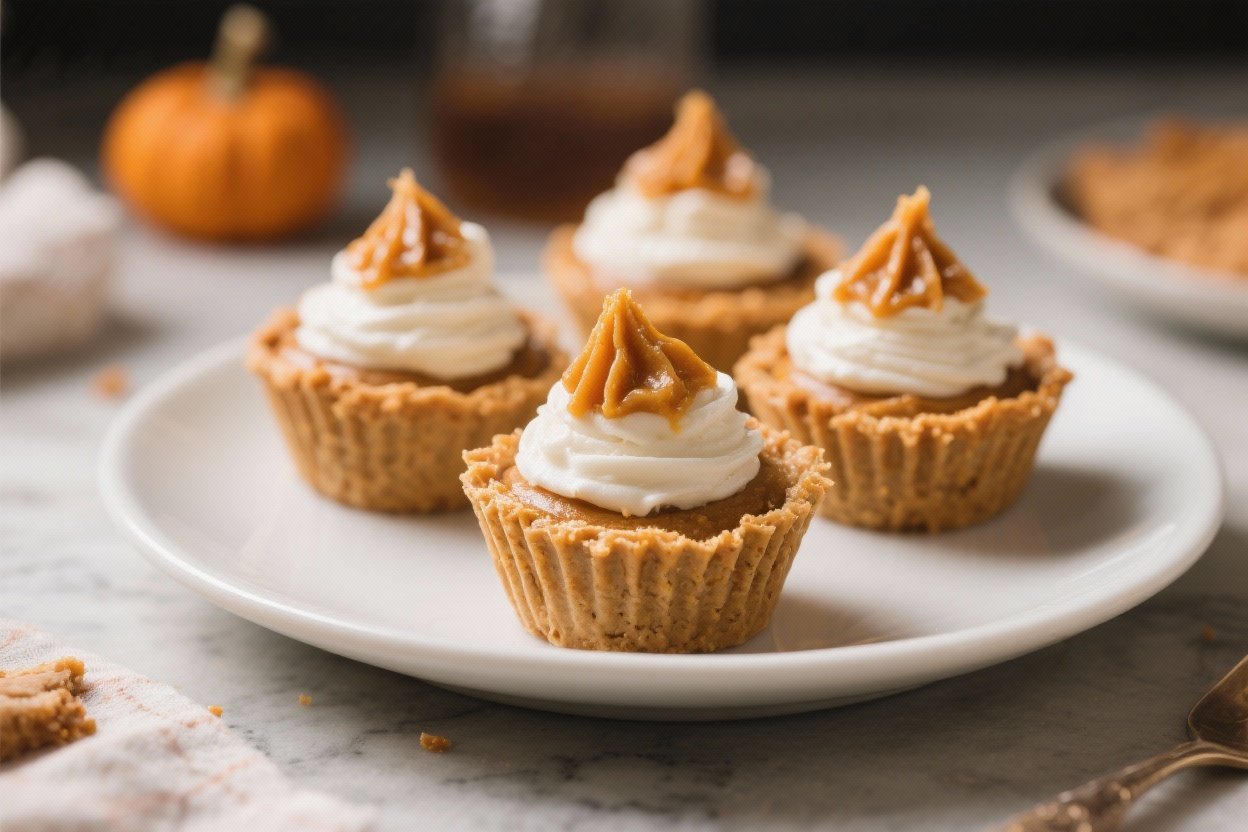
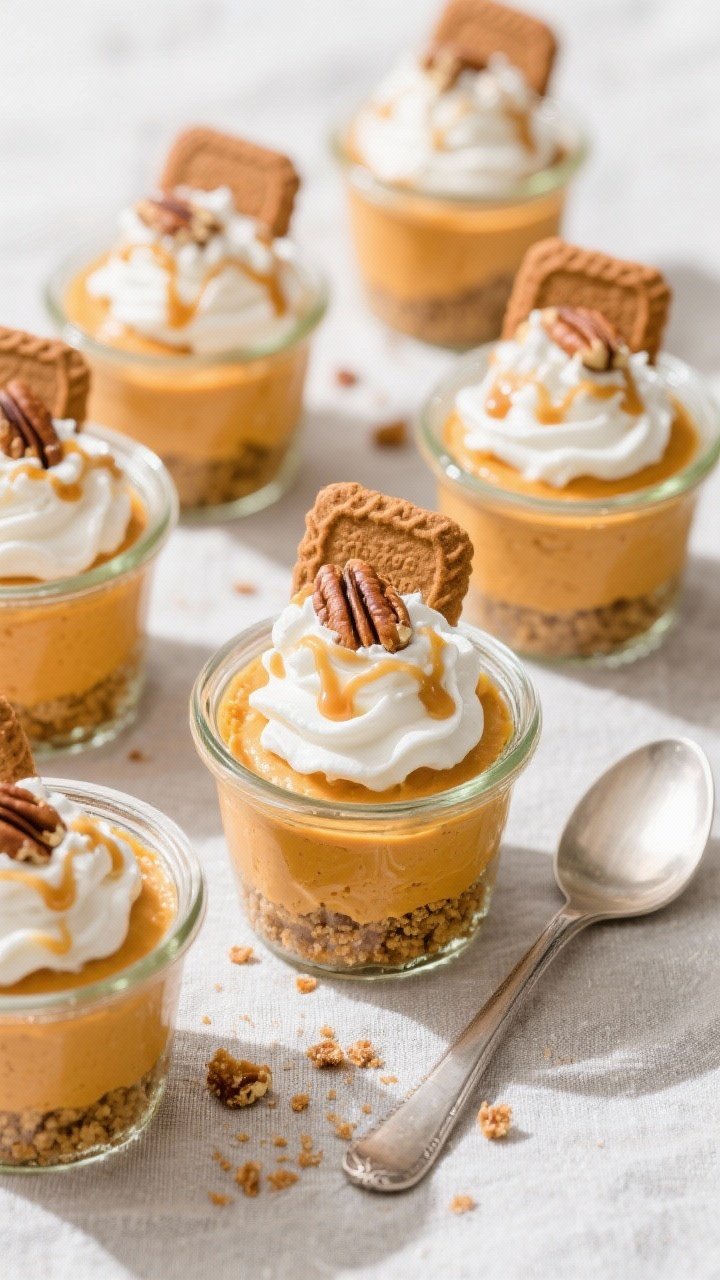
No-Bake Pumpkin Pie Cups You’ll Brag About: 10-Minute Dessert Magic with Zero Oven Drama
Forget the rolling pin. You don’t need it, and honestly, you don’t want it. These No-Bake Pumpkin Pie Cups give you that classic fall flavor without the sweat, stress, or scorched crust.
They’re fast, creamy, and look like you hired a pastry chef—except you just used a mixing bowl and some common sense. Perfect for last-minute gatherings, cozy nights, or when you want pumpkin pie without pretending you like baking.
Overeating is a pattern. This helps you fix that problem. A quick reset for cravings, snacking, and “I’ll start tomorrow” moments.
Built for busy home cooks who want real-life structure. Simple steps that fit meal prep, family dinners, and late-night snack attacks.
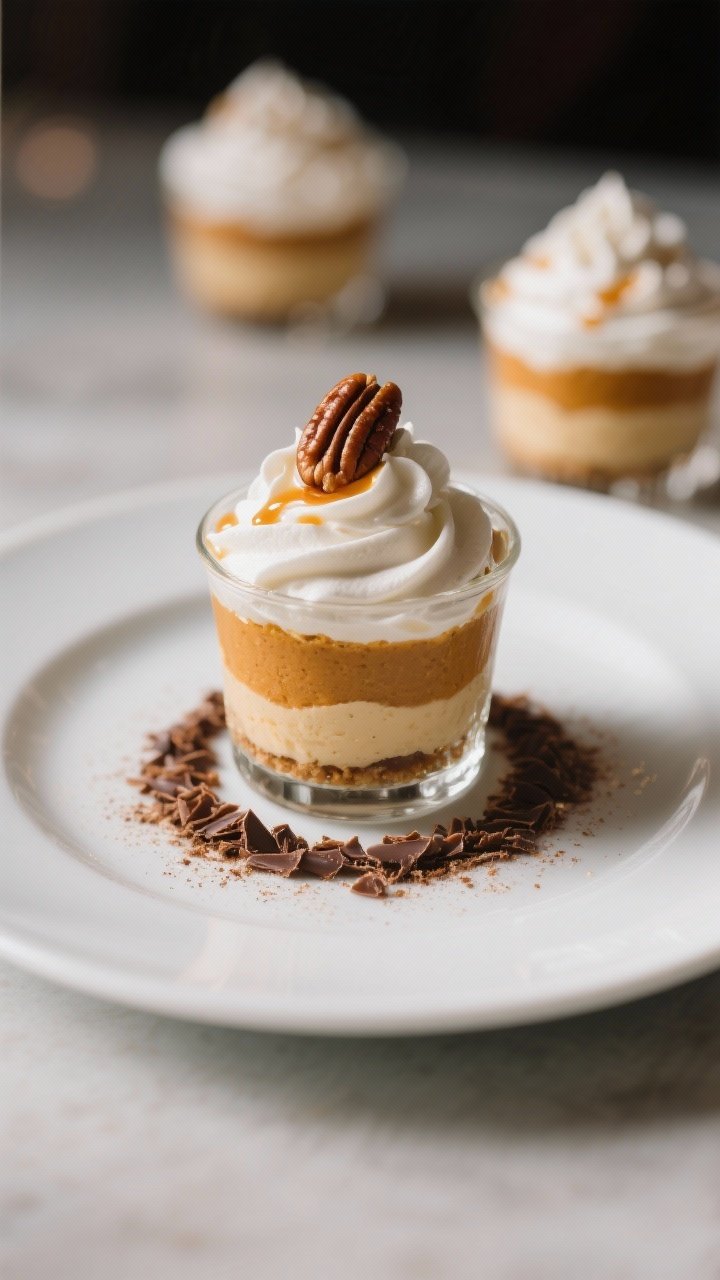
What Makes This Special
Pumpkin pie is great, but waiting an hour for it to bake is not. These cups deliver the same spiced, velvety experience in a fraction of the time, no oven required.
The layered textures—crunchy cookie base, luscious pumpkin mousse, and fluffy topping—hit every note. They’re also portion-controlled, which means your leftovers don’t look like someone took a fork to the pie at midnight (we’ve all been there).
Shopping List – Ingredients
- For the cookie base:
- 1 1/4 cups graham cracker crumbs (or gingersnaps for extra spice)
- 4 tablespoons unsalted butter, melted
- 1 tablespoon brown sugar
- Pinch of salt
- For the pumpkin layer:
- 1 cup pumpkin puree (not pumpkin pie filling)
- 6 ounces cream cheese, softened
- 1/2 cup powdered sugar
- 1/3 cup plain Greek yogurt or sour cream
- 1 teaspoon vanilla extract
- 1 1/4 teaspoons pumpkin pie spice (or 1 tsp cinnamon + 1/4 tsp nutmeg + pinch cloves)
- Pinch of salt
- For the whipped topping:
- 1 cup heavy whipping cream
- 2 tablespoons powdered sugar
- 1/2 teaspoon vanilla extract
- Optional garnishes:
- Crushed gingersnaps or graham crackers
- Shaved chocolate or chocolate chips
- Caramel drizzle
- Toasted pecans
- Equipment:
- 8–10 small cups, jars, or ramekins (4–6 ounce size)
- Mixing bowls, hand mixer or whisk, and a rubber spatula
- Piping bag (optional, for clean layers)
Instructions
- Make the cookie base: In a bowl, combine graham crumbs, melted butter, brown sugar, and salt. Stir until it resembles wet sand.
Spoon 1–2 tablespoons into each cup and press lightly to form an even layer.
- Whip the cream: In a chilled bowl, beat the heavy cream, powdered sugar, and vanilla to medium peaks. Don’t go full butter-churn. Set aside.
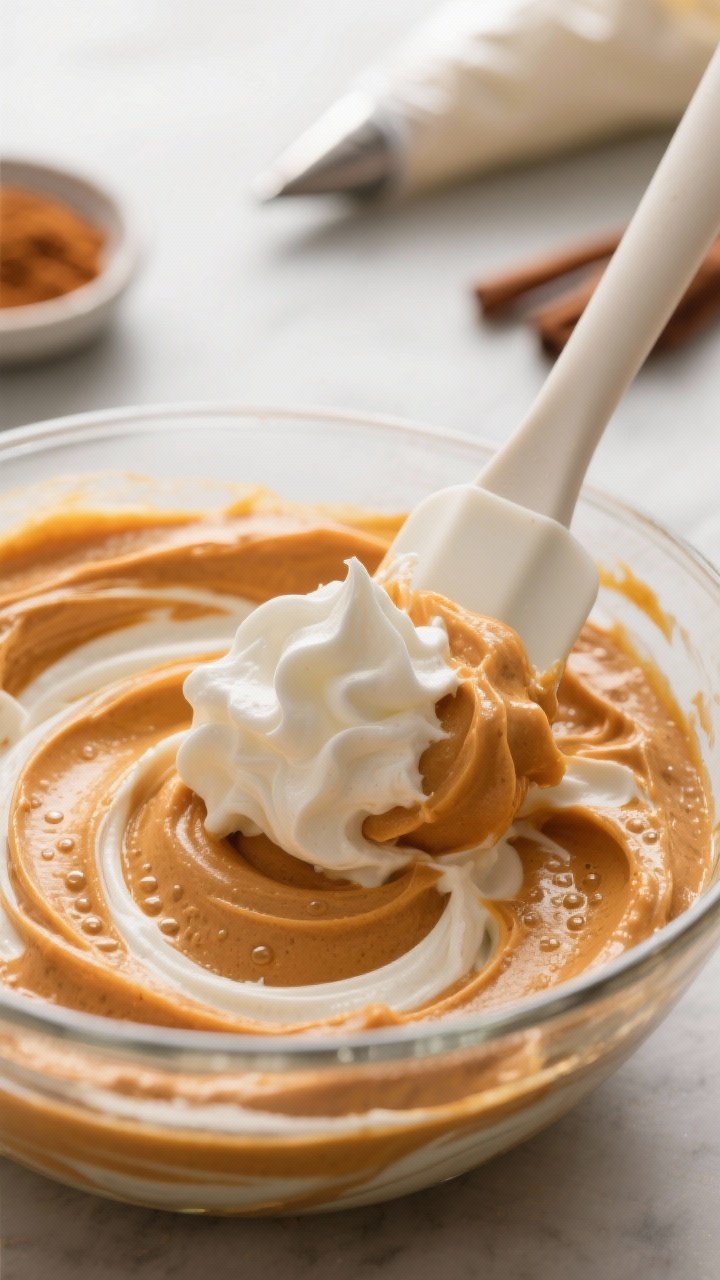
- Blend the pumpkin layer: Beat cream cheese until smooth.
Add powdered sugar, yogurt, vanilla, pumpkin pie spice, and salt. Mix until silky. Fold in the pumpkin puree until fully combined and luscious.
- Lighten it up: Fold half of the whipped cream into the pumpkin mixture to make it mousse-like.
Be gentle, you’re building volume, not cement.
- Layer it: Spoon or pipe the pumpkin mousse over the cookie base. Top with remaining whipped cream.
- Chill: Refrigerate for at least 30–60 minutes to set the layers. Overnight?
Even better. Flavor gets cozier.
- Garnish: Just before serving, add crushed cookies, caramel, chocolate shavings, or toasted pecans for crunch and drama.
Preservation Guide
- Refrigeration: Store covered for up to 3 days. Add crunchy toppings right before serving to avoid the dreaded sog.
- Make-ahead: Assemble the cookie base and pumpkin layer a day in advance.
Pipe the whipped topping the day of for maximum fluff.
- Freezing: Freeze without whipped topping for up to 1 month. Thaw in the fridge overnight, then top fresh. Texture remains creamier if the base is graham vs. gingersnap, FYI.
- Travel tip: Use jars with lids for parties or picnics.
Zero mess, maximum flex.
Why This is Good for You
- Pumpkin power: Pumpkin is rich in beta-carotene, fiber, and potassium. Translation: supports vision, digestion, and hydration balance.
- Protein assist: Greek yogurt and cream cheese add protein and creaminess, so you get satisfaction without inhaling half a pie.
- Manageable portions: Individual cups naturally limit portions while delivering the full dessert experience. Psychology wins.
- Reduced sugar control: You’re in charge here.
Adjust powdered sugar to taste, and no corn-syruped mystery filling in sight.

Don’t Make These Errors
- Using pumpkin pie filling instead of puree: It’s pre-sweetened and spiced; your mousse turns cloying and weirdly runny. Hard pass.
- Skipping the soften step: Cold cream cheese = lumpy filling. Warm it to room temp for a smooth finish.
- Over-whipping cream: If it looks grainy, you went too far.
Add a splash of cream and gently fold to rescue.
- Drowning the base in butter: Greasy crumbs won’t set. Stick to the ratios.
- Assembling and serving immediately: The chill time matters. It firms the base and marries flavors.
Patience—30 minutes minimum.
Alternatives
- Dairy-free: Use dairy-free cream cheese, coconut cream (whipped) instead of heavy cream, and coconut yogurt. Choose vegan cookies for the base.
- High-protein swap: Replace some cream cheese with extra Greek yogurt and add a scoop of unflavored or vanilla whey. Adjust sweetness accordingly.
- Lower sugar: Use a touch of maple syrup or a powdered sugar substitute.
Choose plain grahams and reduce brown sugar in the base.
- Gluten-free: Use gluten-free graham crackers or almond flour mixed with a bit of coconut sugar and butter for a nutty crust.
- Flavor twists: Stir in espresso powder for a pumpkin latte vibe, add orange zest for brightness, or mix in a spoon of bourbon for a grown-up version. IMO: gingersnap base + bourbon = elite.
- Crunch layer: Add a thin layer of chopped toasted pecans between crust and mousse for extra texture (yes, it slaps).
Can I use canned whipped cream instead of homemade?
You can, but it deflates fast and gets watery. Homemade whipped cream holds structure and tastes richer.
If you must, add it right before serving.
How do I prevent a soggy crumb base?
Use the correct butter ratio and chill the cups so the butter firms up. Avoid adding wet toppings too early. Gingersnaps also hold their crunch a bit better.
Can I make this in a big dish instead of cups?
Yes.
Use an 8×8-inch dish, press in the crust, spread the pumpkin mousse, then top with whipped cream. Chill longer—at least 2 hours—so it slices cleanly.
What if I don’t have pumpkin pie spice?
Mix 1 teaspoon cinnamon, 1/4 teaspoon nutmeg, and a pinch of cloves or allspice. Add ginger if you like more warmth.
Taste and adjust.
Is fresh pumpkin better than canned?
Canned pumpkin is consistent and thick, which is ideal here. Fresh pumpkin can be watery unless you strain it. Save the heroics for another day.
Can I make it vegan and still keep it thick?
Yes.
Use vegan cream cheese and coconut cream whipped to medium peaks. Fold gently and chill well. It sets beautifully when cold.
The Bottom Line
No-Bake Pumpkin Pie Cups are the shortcut dessert that doesn’t taste like a shortcut.
Fast to make, easy to customize, and outrageously creamy, they deliver all the cozy fall energy without turning your kitchen into a sauna. Keep the ingredients on hand, and you’ve got a guaranteed crowd-pleaser in minutes. Minimal effort, maximum applause—pretty solid trade, right?
Printable Recipe Card
Want just the essential recipe details without scrolling through the article? Get our printable recipe card with just the ingredients and instructions.